Wednesday, December 23, 2015

Apple, Cranberry & Coconut Pies - The Mince Pie Alternative


These are real simple kick ass recipe for an alternative to mince pies, but still has the Christmasy vibe. They can be whipped up in a flash and can be frozen before baking in a tray or frozen once baked and cooled, making them a lifesaver when unexpected guests descend.


Ingredients

  • 1 sheet shortcut pastry
  • 100g fresh cranberries
  • 2 eating apples, peeled and diced
  • 50g caster sugar
  • 1 tsp vanilla extract
  • 25g desiccated coconut
  • 1 egg


Method

  1. Preheat oven to 180 degrees, and grease a muffin tin.
  2. In a mixing bowl, toss together the cranberries, sugar, apple, and coconut
  3. Roll out the shortcut pastry, and cut out 12 circles. Roll up the off cuts and roll out thinly again. This should give you 12 stars
  4. Place each circle of pastry into the muffin holes and fill each hole with the cranberry and apple filling.
  5. Top with a star and brush with some beaten egg. Finally sprinkle each star with a little sugar and then bake in the oven for 20 minutes.
  6. When the pies are cooked, remove from the oven and place the tray on a wire rack. Immediately, gently go around the outsides of each pie to loosen from the edges. Then wait 10 minutes before removing from the tray and cool completely on the rack. 
  7. Dust with icing sugar and enjoy.


MERRY CHRISTMAS!!!!!

Monday, November 9, 2015

Parsley, Chilli & Garlic Pesto


I've never been a fan of store bought jars of pesto and sauces. I'm  very conscious of additives and sugars in processed food, and I always like to know exactly what I'm eating. It is for this reason I like to make my own sauces and pesto. I normally just make a bog standard basil pesto (excluding the cheese), but last week I decided to make some pesto with a bit of a twist. I've used parsley instead of basil, and blanched almonds instead of pine nuts. I've also upped the 'kick' of the pesto with a deseeded whole red chilli and a large clove of garlic.  I prefer my pesto pulsed rather than blitzed smooth, the texture adds much more to a dish.


I find that this pesto lasts up to two weeks in the fridge, and it's not only good with plain pasta, I used it last week to pimp up a roast chicken,brushing the pesto all over the chicken before roasting in the oven, and the  other day I brushed it over some thick cod fillets before baking in the oven. Today I'm using it as a sauce for my homemade wholewheat sweet potato gnocchi. There are so many more possibilities with this pesto, I find myself reaching for it in the fridge time and time again.


Ingredients
  • I bag of flat leaf parsley
  • 1 fat garlic clove, peeled and chopped
  • 1 red chilli, deseeded and chopped
  • 100g of blanched almonds
  • Salt & pepper
  • Juice of 1/2 fresh lemon
  • Extra Vigin olive oil, approx 100mls (add more if you want a 'wetter' pesto)


Method
  1. Simply add all the above ingredients to a mini food blender and pulsed until you get your own desired consistency. Add more oil if you wish.;
  2. Store in a sterilized container or jar.


Monday, November 2, 2015

Indonesian Style Roast Pork


As much as I love a Sunday roast, sometimes I like to do something a little less traditional with my Sunday dinner. I bought a pork loin for my Sunday dinner and thought I would try something a little different with it than roast potatoes & apple sauce (not that there is any thing wrong with roast potatoes and apple sauce). I love Asian flavours, so I decided to try to recreate the flavours of the food we had whilst in Indonesia...( I'm always cooking Thai, so I thought Indonesian might be some fun).


 I loved my time in Indonesia, especially the food. Here's my slow baked Indonesian Pork Loin, that requires very little effort at all, once the marinade is made. You could then serve this with potatoes, but I decided on a Pea and Raisin Pilaf Rice. I think when I make this again, I will cover the meat in foil (To prevent the marinade from turning too dark and burning), until the final 30 minutes, and also perhaps serve it with a satay noodle side.


Ingredients

  • 1.5kg of basted Pork Loin
  • 4 tbsp of soy sauce
  • 1 tbsp of smooth peanut butter
  • 1 clove of garlic
  • 1 thumb size piece of ginger
  • 1 tsp of cayenne pepper
  • 1 tbsp of Chinese 5 spice
  • 2 tbsp of water
  • 1 onion


Method

  1. Preheat the oven to 150 degrees.
  2. Combine all the ingredients (except for the pork of course) in a blender and blitz to a sauce consistency.
  3. Pour the sauce over the pork and allow to marinade for a few hours at least, ideally over night.
  4. Cover the pork with tin foil and bake in the oven for 3 hours, remove the foil for the final 30 minutes and turn up the oven to 200 degrees.
  5. Allow to rest for 30 minutes before serving.

Monday, October 12, 2015

Tomato Baked Orzo


I've taken a time out from the blog for last two months, a little maternity break, as we welcomed a new addition to our family on Sept 2nd. We now have a gorgeous baby boy called Fionn!! I took the break as time is precious with a newborn, plus I also have my little two year old angel Aoife to consider. So whilst getting used to the lack of sleep and the little time to prepare meals, I had made a decision not to let the blog, diet, exercise;or lack thereof all 3, bother me. Instead I've been getting to know my new little man and sleeping when he's sleeping (only when Aoife is sleeping too which is not too often). So basically, I have my hands full.


Fionn is six weeks old already, so hard to believe. We have been living in our own little bubble since his arrival. He's getting so big and alert and already outgrown 2 sizes in baby wear. The six week milestone is a big one for him, he can now focus on us and he's smiling a lot, which melts my heart!!!


But the six week milestone is also important for me. It marks the beginning of me getting back on track, with diet, exercise, and a few sneaky blog posts (when time allows).


I mentioned diet!!! I'm on a mission to loose the baby weight, or at least most of it in time for Christmas.  This will involve, a lot of exercise, mainly walking with the double buggy and my Kayla Itsines 12 Week BBG.


As today is a Monday, I have decided to start the week with a meat free Monday recipe. I'm making enough for 2-3 meals. It's all about batch cooking these days for us. I'm easing myself into the diet so the first recipe is a pasta style dish.


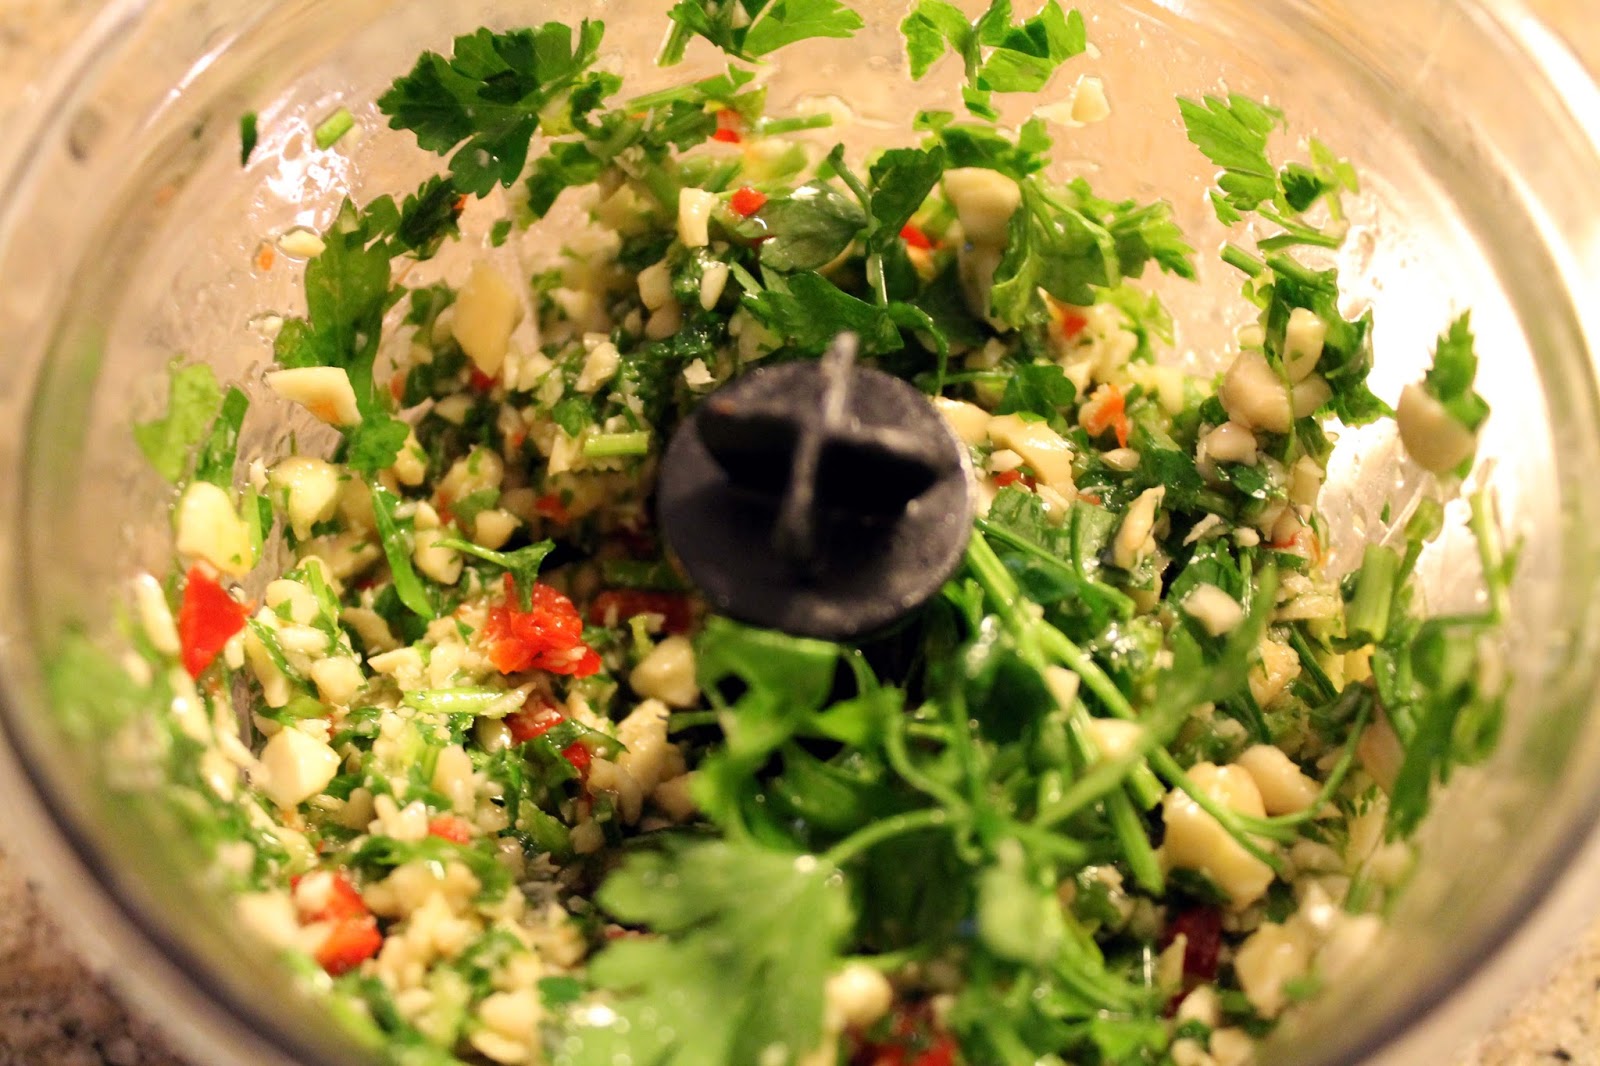
Orzo pasta is a Greek pasta, which resembled rice, but tastes like pasta. If you can get wholemeal, please do, though it is difficult to find. This dish is packed full of flavour, veggies and herbs. It's all made in one pan, making it a true one pot wonder. By baking the dish in the oven, it intensifies the flavours.


Serves 2-3

Ingredients
  • 500g passata
  • 150g orzo pasta
  • 1 tsp Italian herbs
  • 1/2 diced red onion
  • 1/4 red pepper, diced
  • 1/4 yellow pepper, diced
  • 1/4 green pepper, diced
  • 5-6 mushrooms, diced
  • 2 tbsp of chopped mixed herbs (flat leaf parsley, basil, & mint for example)
  • 6-7 olives
  • 2 tomatoes, sliced thinly
  • 100ml of stock
  • Salk & Pepper
  • 2 tbsp of olive oil


Method

  1. Preheat the oven to 180 degrees.
  2. In an oven proof dish, add the oil and onions and saute for a minute.
  3. Add the dried herbs, peppers, mushrooms and orzo.
  4. Saute for a few minutes. Then add the remaining ingredients, except for the tomato slices.
  5. Place the tomato slices on top of the stew like mixture and place the dish into the oven for 40-50 minutes until, all the liquid has been absorbed. 


Tip: I'm serving mine with a green salad, but to make the dish even tastier, you could add slices of mozzarella on the top of the dish before placing it into the oven.


Tuesday, August 25, 2015

Quinoa, Broccoli & Roast Sweet Potato Salad


We closed the bed & breakfast down this Sunday, two months earlier than normal, as we are due to have our 2nd baby in the next week or so. Needless to say things have been fairly hectic and I have absolutely no doubt in my mind that things will get even more hectic within the next few days and indeed weeks!! Hence the lull in blog posts! Pregnancy coupled with running a B&B, all whilst running after a toddler, has left little time for new recipes for the blog. So here today I am taking advantage of the 'rest' time I have allowed for myself and decided it was time to try out the red quinoa that has been sitting in the cupboard for the last month!


With the pregnancy I did relax the dieting a bit, and was in full on carb mode! But now that the end is in sight I've started to think about dishes for my post baby diet, when I will be tryng to shift the odd pound or 50 than I have gained! (I rarely said NO to leftover B&B baking treats). For this reason this dish is an extremely healthy salad which can be used as either a side or bulked up with roast chicken for a substantial low fat, low carb, high protein meal. 


Ingredients

  • 100g Red Quinoa (Cooked according to packet instructions)
  • 4 Spring Onions, diced
  • 3-4 florets of broccoli, chopped small
  • 1 medium sweet potato, peeled and cubed
  • 2 tsp of garam masala powder
  • 1 tsp of olive oil


Method

  1. Boil the broccoli for 3-4 minutes, then submerge in cold water (to retain the bright green colour). This short method ensures that the min. amount of nutrients are lost in the cooking process.
  2. Boil the sweet potato cubes in cold water for 7-8 minutes. Drain well. 
  3. Preheat the oven to 180 degrees.
  4. Spread the sweet potato cubes out onto a baking tray, drizzle over the olive oil and also the garam masala powder. 
  5. Bake the sweet potato cubes for 15 minutes in the oven.
  6. Finally, combine the cooked quinoa, diced spring onions, broccoli florets and the sweet potato cubes together.
This is an extremely versatile recipe, adding a feta cheese, goats cheese or halloumi would work really well here.
I had a harrisa roast chicken as an accompanients, which complemented the salad really well.


Friday, July 24, 2015

Zingy Lemon & Blueberry Scones - The perfect summer scone


Scones are an Irish Institution. I grew up on tradition fruit scones, slathered with butter and jam. What I've come to realize however is scones are quite versatile, be it cheesy savory scones or deliciously sweet scones.
These zesty lemon and blueberry scones are the perfect summer scone. They are an ideal snack for  for your daily elevenes and especially great for those side of the road picnics.
I love a big fluffy scones so I always use self raising flour as well as baking powder, so I get a good rise from my scone!

Ingredients

  • 900g of self raising flour
  • 175g of butter
  • a pinch of salt
  • 60g of caster sugar
  • 3 heaped tsp of baking powder
  • 550ml of full fat milk
  • 50ml of fresh lemon juice
  • Zest of one lemon
  • 200g of bleberries
  • 1 egg (beaten)


Method

  1. Preheat the oven to 230 degrees.
  2. Sieve the self raising flour, salt, and sugar into a large bowl.
  3. Rub in the butter until it resembles coarse breadcrumbs.
  4. Stir in the lemon zest.
  5. Combine the lemon juice and milk and make a well in the centre of the buttery flour mixture.
  6. Pour the milk in and mix until a soft dough forms.
  7. Once the mixture has come together, turn out onto your work surface. Make sure your work surface is well floured so the dough doesn't stick. Rub some flour into your rolling pin also.
  8. Roll out to one inch thick and stamp out the scones with a glass or cutter.
  9. Space then well on a lined sheet of baking paper on a baking tray and brush with the beaten egg to get a lovely golden colour.
  10. Bake in the oven for approx 12-15 minutes until beautifully risen and golden brown.
  11. Cool on a wire rack and then serve with some Irish butter and jam; or if you want some further indulgence some lemon curd and clotted cream.

Saturday, July 11, 2015

Lemon Curd & Blueberry Tarts - The Fastest Tarts in the West


I had to think twice whether or not to post this recipe as it's nearly too easy, and hardly a recipe at all. But then I thought why not show how a bit of quick thinking can help transform just 3 ingredients into something truly scrumptious.

Shop bought ready rolled puff pastry is an absolute godsend! The possibilities for baking recipes are endless. Here I'm using my own homemade lemon curd, but you can just as easy buy a good quality jar of lemon curd.


 The lemon and blueberry flavours are a match made in heaven, but you could always subsitute the blueberries for raspberries if you wish.


I made these tarts this morning for my Bed and Breakfast guests. I'm usually up against the clock in the morning preparing the breakfast, but as these tarts require minimum effort, they were the perfect choice for early morning baking!

Ingredients


  • 1 sheet of ready rolled puff pastry
  • 12 tsp of lemon curd
  • 24 blueberries


Method

  1. Preheat the oven to 180 degrees.
  2. Line a baking sheet with baking paper.
  3. Stamp out 12 circles of pastry rounds
  4. Place 1 tsp of lemon curd in each pastry disc, followed by 2 blueberries.
  5. Pinch up the sides of the circle, so the lemon curd doesn't escape.
  6. Spread the discs out of the baking sheet and bake in the oven for 14-15 minutes.
  7. Allow to cool completely on a wire rack when baked.


Friday, July 3, 2015

Healthier Southern Fried Chicken


What could be more American than a big bucket of fried chicken!!!! So to celebrate the 4th of July tomorrow I decided to make some southern fried chicken for dinner to celebrate the occasion.

While I admit these fried chicken pieces are not something you should eat everyday, I have significantly reduced the calorie content of the chicken by baking the chicken rather than deep frying. Even though the chicken is healthier they are still finger licking good, and with a slaw accompaniment; in the words of Ina Garten, what's not to like???!!!


This recipe is based on 14 drumsticks. Here was I thinking that we will have the leftovers on our picnic to Dingle tomorrow, no such luck as my ravenous husband ate every last one of them. Oh well that's what they were there for!


Ingredients

  • Chicken drumsticks x 14
  • 8 tbsp of wholegrain flour
  • 2 tbsp of sesame seeds
  • 1 tbsp of white pepper
  • 1 tsp of salt
  • 2 tbsp of paprika
  • 4 tbsp of oil 
  • 250 ml of butter milk


Method


  1. Marinade the chicken in the buttermilk, either overnight, or for at least 4 hours. This really tenderises the meat.
  2. In a large plastic sandwich bag, add the flour, seeds, pepper, salt and paprika and ,mix well.
  3. Preheat the oven to 200 degrees.
  4. Take the chicken pieces out of the buttermilk, shake off the excess and place in the flour mixture bag. 
  5. Seal and shake the bag well ensuring all chicken pieces are coated.
  6. Remove the chicken from the bag, shake a little to remove the excess coating and place on a plate ready to give them a gentle fry before baking in the oven.
  7. Put the oil in a non stick frying pan and heat to a high heat, then quickly fry the chicken until lightly browned.
  8. Place the browned chicken in a single layer on a baking dish and bake in the oven for 30 minutes, turning once or twice. The chicken should be a beautiful bronze colour when fulled cooked.
  9. Serve with a generous side of slaw and lots of napkins.


Happy 4th of July


Saturday, June 6, 2015

Fried Aubergine & Killarney Honey - A Spanish Tapa Killarney Style


I was chatting with a good friend of mine the other day about going on holidays and I was recommending the lovely resort town of Costa Teguise in Lanzarote as an option for her to go now that she has a young family. I went there 3 times in 12 months recently! The food there is amazing!! It is here that I discovered the Spanish tapa of fried aubergine with honey. I feel in love with it. Even my husband who is 'afraid' of every type of vegetable couldn't say no to these tasty morsels.


As I was reminiscing about all the wonderful meals we had in that resort, I remembered those gorgeous bite size aubergine slices and all of a sudden I got a mad craving for them. So instead of my usual salad for lunch, I decided to change things up today and make the fried aubergines.


We are incredibly lucky here in Killarney that  there are amazing honey producers close by - Killarney Honey. However, any really good honey will suffice to sweeten up these deliciosus treats.


Ingredients

  • 1 aubergine, peeled and sliced into round discs
  • Sea salt
  • Table salt
  • 1-2 tbsp of flour
  • Good runny honey
  • Good quality  balsamic syrup
  • 5-6 tbsp of rapeseed oil (or other flavourless oil)


Method
  1. Place the aubergine slices in a plate and sprinkle with the table salt and leave for 10 minutes.
  2. Using kitchen paper, press down on the slices to release and remove all the water that seeps from the slices.
  3. Put the oil on a high heat.
  4. Place the flour on a plate and dip each slice of abergine into the flour, making sure they are completely coated. Shake off the excess flour.
  5. Carefully place each disc of aubergine in the hot oil, and cook for 2 minutes, before turning and cooking for a further 2 minutes, or until golden brown.
  6. Remove the slices from the oil and place on kitchen paper to allow the excess oil to drain away.
  7. Place the disc of aubergine on a plate and drizzle generously with your honey, sprinkle with coarse sea salt and finally drizzle for balsamic syrup over the aubergine.

Related Posts Plugin for WordPress, Blogger...