Thursday, March 28, 2013

Easter Chocolate Bark


I had my little niece over this afternoon and we went 'barking mad', making up all sorts of chocolate bark concoctions.


These barks are childsplay to make and can be made to suit grown-up tastes or also can be made using any type of sweets and candy that kiddies love. I found that marshmallows went down a treat with the little one!!!!


There really is nothing to this recipe; simply melt the chocolate and sprinkle over the ingredients you fancy. We chose for this particular outing to do a kiddies version and a more sophisticated version.


Marshmallow & Candy Bark


Ingredients

  • 30g of mini marshmallows
  • 1 packet of Nestle Smarties
  • 1 small packet of Cabury's Mini Eggs
  • 1 Cabury's Crunchie bar, crushed.
  • 250g of plain chocolate.


Method

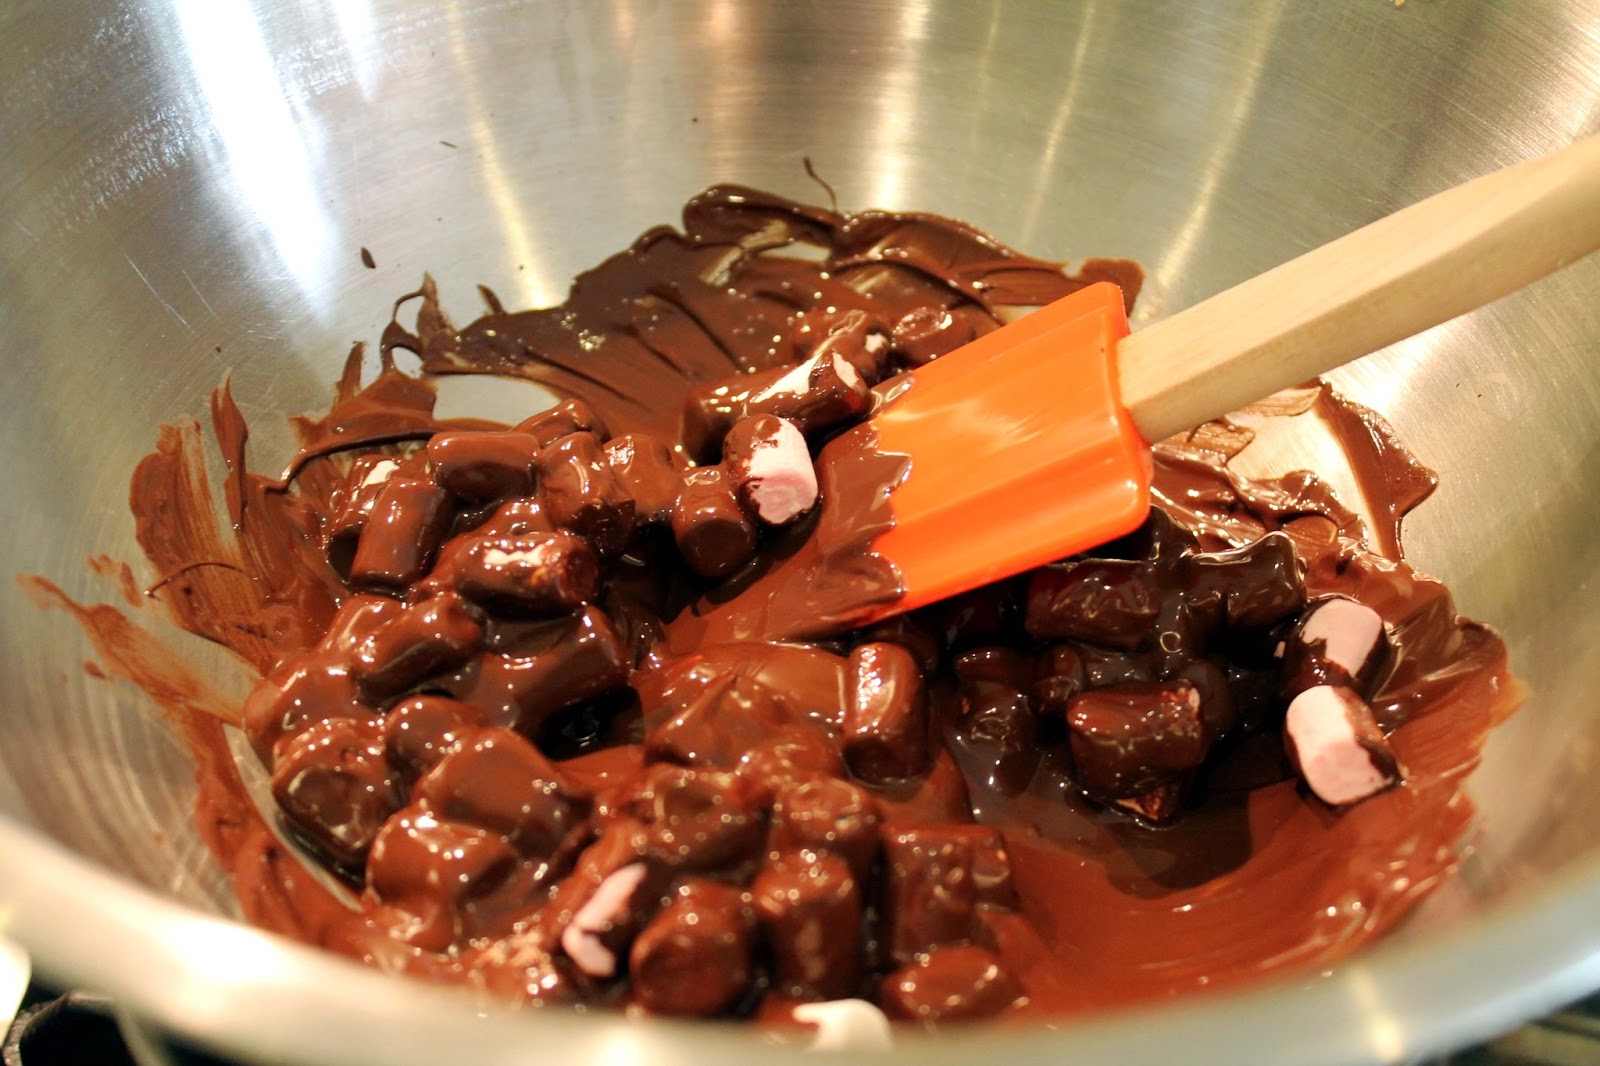
  1. Break up the chocolate and put in a heat proof bowl, which is over some simmering water. Allow to melt fully.
  2. Get a baking tray and rub some oil dipped in kitchen towel.
  3. Then line the tray with baking parchment and rub the parchment paper with some of the kitchen towel soaked in oil
  4. Stir the marshmallows into the chocolate then pour the chocolate out over the tray evenly distributing it.
  5. (This is where the kiddies come in) Scatter the chocolate with the desired candy treats.
  6. Place the baking tray in the fridge for 1 hour to firm up, or if (like me) you are terribly impatient, place in the freezer for 20 minutes.
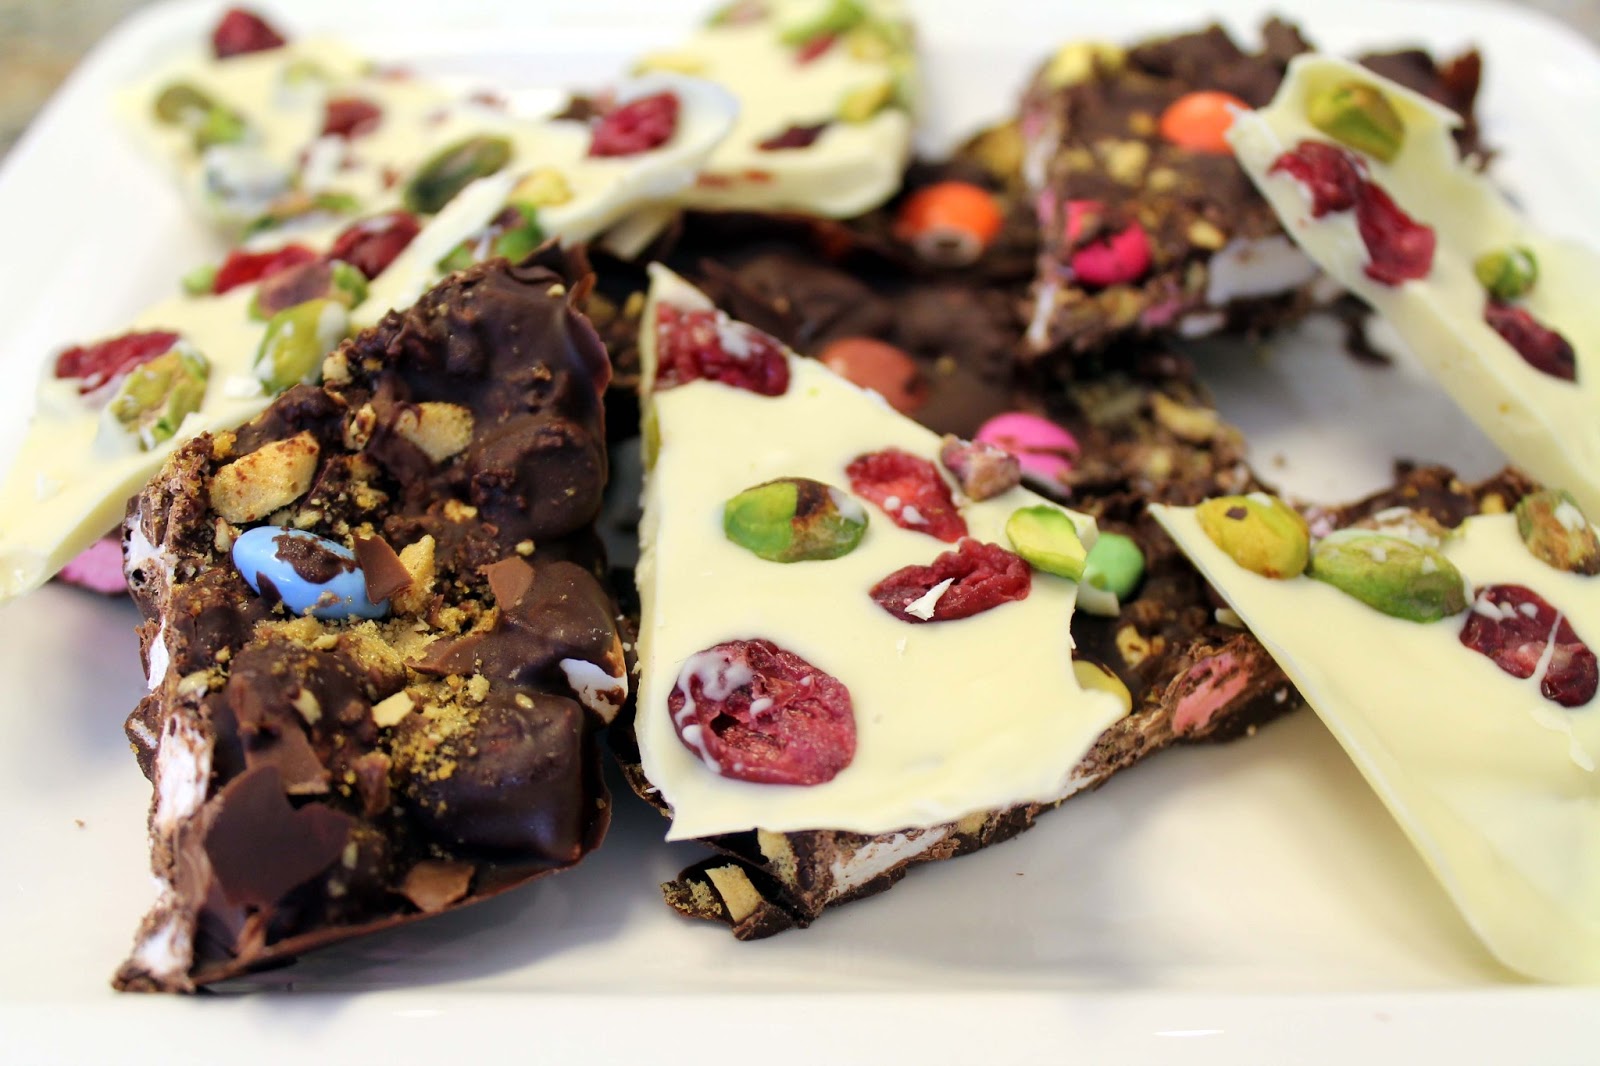
  7. The idea of the bark is to look a bit rustic and messy, so cut shards in at uneven angles for that homemade look.
  8. The chocolate bark will keep up to 3 days in an air tight container in the fridge; though I severely doubt they would last 3 hours.


Sweet Cranberry & Pistachio White Chocolate Bark

This more sophisticated bark is more for the adult audience and would be ideal to serve to guests with coffee at the end of a dinner party. The method is the same as outlined above, just substitute the white chocolate for the dark chocolate and omit the marshmallows and candies and instead use 1/2 cup of sweet dried cranberries and 1/2 cup of peeled chopped pistachio nuts.


You can experiment with whatever flavours you wish, using perhaps mint chocolate instead of plain chocolate; using cut up pieces of your favourite chocolate bars, any dried fruits or you could just go for full on nutty mode with nothing but nuts. The combinations and choices are endless.


Tuesday, March 26, 2013

No Butter Banana & Walnut Loaf


I love bread, all different types of bread; but I'm only too aware of the quantity of butter used to make bread so darn tasty. I've been trying for a few weeks now to come up with a banana bread (and a carrot cake) that doesn't require butter or oil. I've had a few mishaps but I think I've finally cracked it.


This bread recipe uses buttermilk instead of butter and oil. Buttermilk is wonderful low in fat, but helps to keep the bread really moist. I've tried this recipe with the buttermilk and no oil; then 1 tablespoon of oil; but I think it really does require 2 tablespoons of oil to maintain the moistness. Sure, 2 tablespoons of oil never killed anyone, especially for a whole loaf of bread.


When making this recipe it's very important to use blackened bananas; the flavour from overripe bananas is so much better than just ripe bananas.The walnuts also not only add a wonderful texture to the bread, but also a fantastic nutty flavour.

(mashed bananas, not so attractive when mixed with the buttermilk & oil, but don't be fooled...)

This recipe is super fast to make in a food processor; with very little elbow grease required. It's nearly too easy.

Ingredients

  • 2 eggs
  • 170g of caster sugar
  • 165g of flour
  • 4 ripe bananas, mashed
  • 80ml of buttermilk
  • 2 tbsp of olive oil
  • 1/2 tsp of baking powder
  • 1/2 tsp of bicarbonate powder
  • 1 tsp of vanilla extract
  • 100g of chopped walnuts


Method

  1. Preheat the oven to 180 degrees and line a 1lb loaf tin with baking paper.
  2. Add the eggs and sugar to the food processor and whizz for three minutes
  3. Meanwhile, add the oil, buttermilk and vanilla to the mashed bananas and incorporate them together.
  4. Add the wet ingredients to the food processor and whizz until combined.
  5. Then add the flourt, baking powder and the bicarbonate soda to the processor and pulse until nicely combined (careful not to over process at this stage)
  6. Gently fold in the chopped nuts and transfer the cake mixture to the loaf tin.
  7. Bake in the oven for 50-60 minutes (check that it's fully baked by inserting a skewer into the centre of the loaf and if it comes out clean then the bread is ready, if its a little sticky, bake for a further 5-10 minutes and repeat the skewer step)
  8. Cool in the tin on a wire rack.

Saturday, March 23, 2013

Low Fat Mexican Turkey Bean Burgers


Burgers are reserved for treat days and not something I would indulge in every week. However these turkey bean burgers are super healthy, low in fat and full of protein; you could eat them everyday of the week if you wished!!!!


This recipe is super quick using a food processor, and the mixture can be frozen also, making it super convenient to have healthy burgers close by; guilt free!


Ingredients

  • 370g of diced turkey breast
  • 400g tin of kidney beans (or black eyed beans would work well too)
  • 3 tsp of chipolte paste
  • 8 slices of spicy jalapeno pepper
  • 1 brown onion, sliced
  • 1 slice of wholegrain bread
  • Salt/pepper
  • 4 spring onions, sliced thinly
  • 4 tbsp of chopped coriander


Method

  1. In a food processor, add the onion and the bread and pulse until combined.
  2. Then add the beans, tukey,salt, pepper, chipolte paste, and jalapenos.
  3. Blitz the ingredients until smooth
  4. Transfer the mixture to a bowl and refrigerate for an hour.
  5. Mix in the fresh herbs and the spring onions to the turkey mixutre.
  6. With wet hands, mould the burgers into the desired size or use a measuring ring. (you can make mini burgers, or whoppers; the choice is yours). I'm making 2 burgers and freezing the rest for a future dinner.
  7. Place the burgers on baking paper.
  8. Cook in an oven preheated to 200 degrees, until cooked through (depending on their size, mine took 30 minutes)


Best accompanied with spicy potato wedges and homemade guacamole, or spicy pink sauce made with shop bought salsa and mayo.


Friday, March 22, 2013

Rachel's Apricot & Oats Flapjack Squares


Rainy days were meant for baking and pottering around the kitchen I've always believed! So with today being particularly miserable outside, I set about busying myself with some baking. 


With our first newborn baby due to arrive any day, I'm busy getting the house in order and the freezer packed with frozen meals. The freezer is full to the gills with tubber ware boxes of stews, shepherd's pies, and lasagnas  So to be fair, I'm fairly well prepared. But I thought to myself, its fine to have the dinners ready, but what about healthy snacks in between meals?! I'm under no illusion that for the first few weeks I won't have any time to be baking buns and bars; so I  thought today, why not make some healthy, high energy flapjacks and freeze them for when the baby comes. That way a healthy energy boost is never too far away, plus it might keep me away from chocolate bars also.


I have made and blogged about flapjacks in the past http://serenasmediumrare.blogspot.ie/2013/01/nuts-about-seedy-fig-flapjacks.html ; but this time I'm making Rachel Allen's Chewy Apricot and Oats Flapjacks which I stumbled across on her website. The only thing different I added to her recipe is 100g of sesame seeds. (LOVE the sesame seeds!). I also substituted low fat spread for full fat butter in the recipe. 

The flapjacks may have a lot of sugar, syrup and butter; but they also have a large quantity of oats and seeds and dried fruit; all of which are extremely healthy. Plus a little goes a long way, I've cut them up small as with all those high energy ingredients, you don't need to eat too much of them to get the desired energy boost.


Ingredients
  • 300g/11oz porridge oats
  • 100g/4oz pumpkin or sunflower seeds & 100g/4oz sesame seeds.
  • 50g/2oz desiccated coconut
  • 50g/2oz plain flour 
  • 200g/7oz low fat butter spread
  • 200g/7oz golden syrup 
  • 150g/5oz soft brown sugar
  • 150g/5oz dried apricots, chopped 
  • 125g/4.5oz crunchy peanut butter 
  • 1 tsp vanilla extract 
Method

1. Preheat the oven to 160C/325F/Gas 3. 

2. Line an 18cm/7inx28cm/11in Swiss roll tin with non-stick baking parchment, leaving a little of the parchment hanging over the edges for easy removal later.

3. Place the oats, seeds, coconut and flour into a large bowl and mix together.
 
4. Place the butter and golden syrup into a saucepan and cook until the two ingredients have melted and combined. 

5. Add the sugar, chopped apricots, peanut butter and vanilla extract to the saucepan and mix well. Then pour the mixture into the bowl of dry ingredients and mix together until the ingredients have become evenly combined.

6. Pour the mixture into the prepared tin and press down firmly with a wooden spoon. Transfer the tin to the oven and bake for 20-25 minutes, or until the mixture has become golden-brown and slightly firm. Remove the mixture from the oven and allow it to cool in the tin. 

7. Once the mixture has cooled remove it, and, still in the paper, cut it into squares.

8. Store in an air-tight container for up to one week. If freezing, to defrost just removed the desired quantity before bedtime and place in the fridge.


Monday, March 11, 2013

Healthy Spotted Dog


I make Spotted Dog every morning when in peak season in the B&B; my guests love it and so does my family. It's a wonderful recipe I learned whilst attending a cookery course in Ballymaloe by the famous Darina Allen.


This is a fabulous Irish recipe, perfect to share with the readers in the lead up to St Patrick's Day. Ever the health conscious I've tweaked the original recipe just a little to make the bread a little healthier; which will help with the guilt of overeating it.


Spotted dog is wonderful with lashings of Kerrygold Butter (now softer) and Strawberrry jam, when fresh from the oven. But my own personal favorite way of having this bread is with Kerrygold butter and chunks of Mature Irish Cheddar Cheese and some creamy homemade coleslaw.


The trick to getting a fantastic light bread is all in the technique of lifting the flour and adding air into the dough; do not skip or slack on this step, Spotted Dog is sometimes called a cake of bread so treat the dough with the same care as you would treat a cake.


The bread freezes well too, sometimes I like to make two to three cakes of spotted dog; and when they are completely cooled, I half them and wrap them well in tin foil and freezer bags and throw them into the freezer. To defrost for a lovely breakfast bread at the weekends when it's just myself and my husband; I just take the half loaf out of the freezer and let it defrost on the counter top overnight.

Ingredients

  • 200g plain flour
  • 250g of wholemeal flour
  • 350ml of buttermilk
  • 1 egg
  • 1 tsp of bicarbonate soda
  • 2 tsp of sugar
  • 1 tbsp of salt
  • 100g of sultanas
  • 20g of porrigde oats


Method

  1. Preheat the oven to 220 degrees.
  2. Sift the flour into a bowl with the bicarbonate soda, sugar, salt and sultanas.
  3. Lift the mixture with your fingers, allowing the flour mixture to fallen between your fingers, this adds air to the flour and as mentioned above is a critical step in getting a nice light bread. Do this 10 times or so.
  4. Mix the buttermilk and the egg together in a jug.
  5. Making a well in the centre of the dry ingredients and add the liquid.
  6. Mix to combine, taking care not to over mix.
  7. Turn out onto the counter and mould gently into a round shape.
  8. Place on a baking tray lined with baking paper.
  9. Cut a cross in the cake with a sharp knife (Irish folklore says this is so the fairies can escape)
  10. Top the cake with the porridge oats and bake in the oven for 20 minutes.
  11. After 20 minutes turn the oven down to 200 degrees and bake for a further 30 minutes.
  12. Cool on a wire rack.


The bread doesn't keep very well over a few days; though I doubt there'll be any trouble in finishing it off in a day.

There's nothing more Irish than homemade soda bread; so why don't you try this recipe for St Patrick's Day.


(Above:Serving suggestion from Kerrygold Butter, Now Softer)


Wherever you are in the world Lá Fhéile Padriag Shona Daoibh; have a good one!

Don't forget to check out my recipe for a good strong Irish Coffee..http://serenasmediumrare.blogspot.ie/2012/03/best-irish-coffee.html

Go on, go on, go on!!


Friday, March 8, 2013

Apple & Blueberry Muffins


From baking muffins for the B&B I can quite literally whip up a batch in my sleep by now. It's always boring though baking the same thing day-in day-out; so today I tweaked my muffin recipe (just a little) to get a new twist on my breakfast muffins. Still adapting the basic recipe from Clodagh McKenna's Muffin recipe in her book Homemade; here are my Apple and Blueberry Muffins; ideal for breakfast, but too yummy to to wait for breakfast to have one.

These are perfect treats if you want to surprise your mom with something homemade on Mother's Day morning. There's nothing better than homemade gifts!!


Ingredients

·         400g Plain flour
·         150g Caster sugar
·         80g Butter
·         2 eggs
·         1 tbsp Baking powder
·         Zest of an orange
·         260ml Buttermilk
·         1 tsp of salt
·         1 cooking apple grated
·         200g of fresh blueberrries


Method

1.       Sieve the flour into a bowl, along with the baking powder, salt and sugar.
2.       Melt the butter over a low heat.
3.       Zest the orange over the flour mixture
4.       Lift the flour mixture high from the bowl and let it fall between your fingers, do this maybe 10 times. This helps to lighten the flour.
5.       Beat the eggs in a jug with the buttermilk and add the melted butter once its cooled slightly and the orange juice.
6.       Fold the wet ingredients into the dry ingredients.
7.       Add the apple and blueberries and gently fold.
8.       Have the oven preheated to 200 degrees.
9.       Line a muffin tray with paper cases and using a dessert spoon fill each case.
10.   Bake in the oven for 20 minutes.
11.   Remove and cool on wire rack.


Thursday, March 7, 2013

Open Baked Aubergine & Goats Cheese Sandwich


I'm like Joey in Friends.... I  LOVE sandwiches. I would live on them given half the chance. I'm not talking about finger print flat ham and cheese triangles though, they go in the Food Hell bin for me. No; I'm huge lover in artisan sandwiches, particularly Mediterranean ingredients such as roast peppers, feta, parma ham etc.


I'm always trying to come up with new combinations to keep things interesting. Flavour and health are my main concerns. The sandwich needs to have bags full of flavour to start! The sandwich also needs to be healthy and low fat! That is a big concern for me.


This aubergine & Goats Cheese sandwich on a wholegrain bagel ticks all the boxes for me. You'd hardly call this a recipe even, it's just a sandwich i hear you say! This is one of those weekender sambos that you make for your girlfriends when sharing gossip from the night before; or a sambo for a working lunch appointment at home. The spread is used is my homemade hummus. This is much healthier than mayo or butter; and a lot tastier.


So without further jibber jabber, here's how I made my Open Baked Aubergine & Cheese Cheese Sandwich.

Serves 1

Ingredients

  • 1 wholegrain bagel, halved (your can choose which ever bread you prefer though)
  • 2 tbsp of hummus
  • 1/4 of aubergines, cut into 6 thin rounds
  • Low cal cooking spray
  • Salt/pepper
  • Lemon juice from 1 lemon
  • A few sprigs of thyme
  • 6 thin slices of goats cheese (pasteurized if pregnant)
  • Soon lettuce leaves to serve.


Method

  1. Preheat the oven to 180 degrees
  2. Place the aubergine rounds on baking paper, toss in lemon juice, salt, pepper and thyme, and spray with low cal spray.
  3. Allow the rounds to bake on the tray spread out, for 20 minutes.
  4. Toast your bagel halves
  5. Top each round of aubergine with a slcie of goats cheese and continue to bake for a further 5 minutes.
  6. Spread the hummus over each half of bagel and top each slice with 3 aubergine and goats cheese rounds.
  7. Use soon lettuce as a garnish and if you have some balsamic glaze, it's nice to squeeze some glaze over the sandwich; otherwise top each piece of goats cheese with some balsamic glaze, very sparingly.

Note: here's a link to home made hummus on the blog: http://serenasmediumrare.blogspot.ie/2012/12/dips-n-chips-for-christmas-drinks.html 


Saturday, March 2, 2013

Healthy Meatloaf & Low Fat Tomato Sauce


I'm a huge believer in making meals from scratch rather than buying convenient prepacked jars/sauces and ready meals. It eliminates the risk of consuming artificial additives and sugars; plus homemade is always best; its tastier, healthier and  fresh. These days it can be difficult to know what's exactly in ready made food we buy. With all this in mind, it's a wonder at all why one would buy ready made meals at all.


This meat loaf is made with extra lean steak mince meat from my local butchers, ensuring a healthy, high quality meat. 


The tomato sauce I've made to accompany the meatloaf, is simple to make and extremely low fat with no butter or cream in sight. It's a great basic tomato sauce recipe to have, as it goes well with pasta and fish and is a great pizza base. Plus did I mention it has almost zero calories. 


The meatloaf freezes well also, once frozen and defrosted correctly, meaning freeze it completely cool in an airtight container and defrost in the fridge overnight within 3 months.

Ingredients

Meatloaf
  • 500g of extra lean steak mince
  • 1 large egg
  • 1 clove of garlic, chopped
  • 2 carrots (grated)
  • 1 onion, chopped
  • 3 tbsp chopped rosemary
  • 6-7 leaves of sage
  • 2 slices of wholemeal brown bread
  • 3 tbsp of worchester sauce
  • Salt and pepper
  • 1 tsp of olive oil.

Tomato Sauce
  • 6 tomatoes, chopped
  • 1 clove of garlic, chopped
  • 1 onion, chopped
  • 1 tbsp of tomato paste/puree
  • 1 tbsp of red wine vinegar
  • 1 tsp of dried oregano
  • 1 tsp of olive oil
  • Salt and pepper
  • 6 basil leaves, finely shredded

Method
  1. Preheat oven to 190 degrees
  2. Add all the meatloaf ingredients to a food processor and blitz until well combined
  3. Rub the olive oil into a loaf tin and transfer the meatloaf mixture to the tin
  4. Place the tin in oven proof dish and fill the oven proof dish half way up with water (bain marie)
  5. Bake in the middle of the oven for 30 minutes, after 30 minutes cover the meatloaf with tin foil to prevent it burning and bake for a further 25-30 minutes.
  6. Meanwhile, saute the onion and garlic for the tomato sauce on a medium heat with the tsp of olive oil. Add the oregano and puree and continue to saute.
  7. Add the tomatoes and mix well. Add the salt, pepper and red wine vinegar and allow the tomatoes to cook down to a 'mushy' consistency.
  8. Pour the tomato mixture into a jug and blitz with a hand held blender.
  9. Return to the pan. The sauce should have a smooth consistency now.
  10. Add the shredded basil and more pepper if necessary.
  11. To plate up, remove the meatloaf from the oven and take it out of the loaf tin. Allow it tot rest for a few minutes below cutting it into slices. Place the tomato sauce in the centre of a plate and top with 2 slices of meatloaf per person.
Serving Suggestion: Garden Peas and garlic and rosemary roast potatoes


Related Posts Plugin for WordPress, Blogger...