Showing posts with label chocolate. Show all posts

Monday, July 4, 2016

Chocolate Caramel Bites - Speedy Sweet Canapes


This post isn't even a recipe, I couldn't call it that, as these bites are just a simple assembly job. In saying that they taste amazing, too good not to share! I love to have something nice and sweet greeting all my guests arriving to the Bed and Breakfast. Sometimes I have time for cupcakes or brownies,  but there are some busy days when I don't have enough time for anything other that pimping up melted chocolate!

For these little bites from heaven, I use all butter shortcrust pastry case from Marks and Spencers. I have made these from scratch before using shortcrust pastry, but these shop bought ones are great, especially if you are on a time budget

A staple in everyone's pantry should be Nestle's Carnations Caramel Sauce, it's awesome! So good in so many treats.

The final ingredients were some dark chocolate and some candy sprinkles. Here's the assembly recipe!


Ingredients

  • 1 can of Carnation Caramel
  • 1 100g bar of good dark chocolate 
  • Sprinkles
  • Ready made mini  all butter shortcrust pastry cases


Method


  1. Melt the chocolate in the microwave in 30 second bursts
  2. Place 1/2 tsp of carnation caramel in each pastry case
  3. Pour 1/2 tsp of melted chocolate over the caramel and place your sprinkle of choice on the melted chocolate.
  4. Put in the fridge for 20 minutes and they are ready to eat.


Perfect for a tea party, last minute guests, or a canape for a drinks party. I myself put them on a table in the hallway of my Bed and Breakfast, so chocolate is the first thing that my guests see when they walk through the door.


Wednesday, March 16, 2016

Chocolate Chip Cupcakes with St. Patrick's Day Frosting


We love St Patrick's Day in this house. It's always a big family day and an excuse to eat some lovely Irish food, watch the parade in town and maybe (just maybe) have a little tipple (or two).This year we have the added bonus of babysitting my two little nieces also, so we will be baking these cupcakes in the morning for their arrival!


I trial-baked these cupcakes on Sunday with my daughter to share with her cousins on a playdate. We made 12, and they went down so well that I actually didn't have one to myself at all. I had to rely on family taste reviews to let me know that they were good. Very good I'm told. Too good my mother said!! I used Rachel Allen's recipe for chocolate cupcakes from her book Cake; and just added 100g of chocolate chips. I tried to make the frosting as green as I could. I ended up using a full tube of green gel food colouring.


Where ever you are celebrating St Patrick's Day, I hope it's a safe and fun day for everyone. Fingers crossed for good weather. (nothing worse than parade watching in an unbrella jungle)

Ingredients

Cupcakes

  • 100g soft butter
  • 150g of vanilla sugar (sugar in a jar with vanilla pods)
  • 2 large eggs
  • 125ml milk
  • 175g plain flour
  • 2 tsp baking powder
  • pinch of salt
  • 25g cocoa powder
  • 100g chocolate chips
St Patrick's Day Frosting
  • 100g very soft butter
  • 225g icing sugar, SIFTED
  • 30ml milk
  • 1 tsp of vanilla extract
  • 1 tube Dr Oetker green food colouring (or any colour). The more colouring you add the deeper the colour of your icing.


To Decorate

  • Chocolate stars (or smarties, chocolate shavings, sprinkle, to name a few)


Method

  1. Preheat the oven to 180 degrees and line a muffin tray with 12 paper cases.
  2. Using a hand whisk (or electric) cream the butter, add the sugar and whisk until light and fluffy.
  3. Whisk the eggs in a bowl and then slowly add them to the butter, whisking all the time.
  4. Pour in the milk and beat until mixed.  
  5. Sift in the flour, cocoa powder, salt, and baking powder.
  6. Add the chocolate chips and gently fold stir until the flour mix is incorporated in.
  7. Divide the bun batter between the 12 cases and then bake in the oven for 20 minutes.
  8. Allow to cool on a wire rack in the tray for 5 minutes, then remove and cool completely. They need to be completely cooled before icing, otherwise you will have a runny mess.
  9. To make the icing, whisk all the icing ingredients together, either using a hand held whisk or an electric mixer.
  10. You can decorate using a piping bag, but I prefer a more 'homemade, rustic' finish and used a warm palate knife.
Enjoy and Happy St. Patrick's Day!!!


Friday, March 27, 2015

Chocolate and Orange Blossom Marble Cake


I recently watched the Comic Relief Great British Bake Off and I was left in stitches at the celebrities attempts at baking, some highly skilled for amateur bakers, others clearly need to stick to their day jobs, mentioning no names - Jonathon Ross. It provided great entertainment nonetheless. The baking of the marble cake, left me with a hankering for some marble cake myself. So I set about googling marble cake. I came across a very easy recipe for the marble cake on the BBC Food website; so I used that recipe with a tweak or two from myself.


I find the BBC Food website is a fantastic outlet for cooking/baking ideas; and is great bedtime reading on the mobile version in bed.

Here's how I made my marble cake. Just in time for a weekend treat!

Ingredients

  • 175g of soft butter
  • 175g of caster sugar
  • 3 free range eggs, beaten
  • 1 tsp of vanilla extract
  • 225g of self raising flour
  • 2 tbsp of milk
  • 1 tbsp of orange blossom
  • Zest of an orange
  • 2 tbsp of cocoa powder


Method
  1. Preheat the oven to 180 degrees and grease and line a loaf tin (or just use a silicone tin - they are all the rage now don't you know).
  2. Cream the butter and the sugar with an electric whisk, until pale and fluffy.
  3. Add the beaten eggs a little at a time whilst continuing to whisk. 
  4. Whisk in the vanilla extract.
  5. Sift in the flour and gently fold into the beaten egg, sugar, & butter mixture.
  6. Divide the batter into 2 equal parts.
  7. Sift the cocoa powder into one mixture and stir the orange blossom and orange zest into the second mixture.
  8. Add large spoons of each mixture into the loaf tin, alternating to give a marble effect. I used a skewer to swirl the mixture a little for a more marbled pattern.
  9. Bake in the centre of the oven for 50 to 60 minutes. Bake until a skewer comes out clean.
  10. Allow to cool completely in the tin before turning out.
  11. Enjoy with a big cup of tea or coffee.

Friday, May 9, 2014

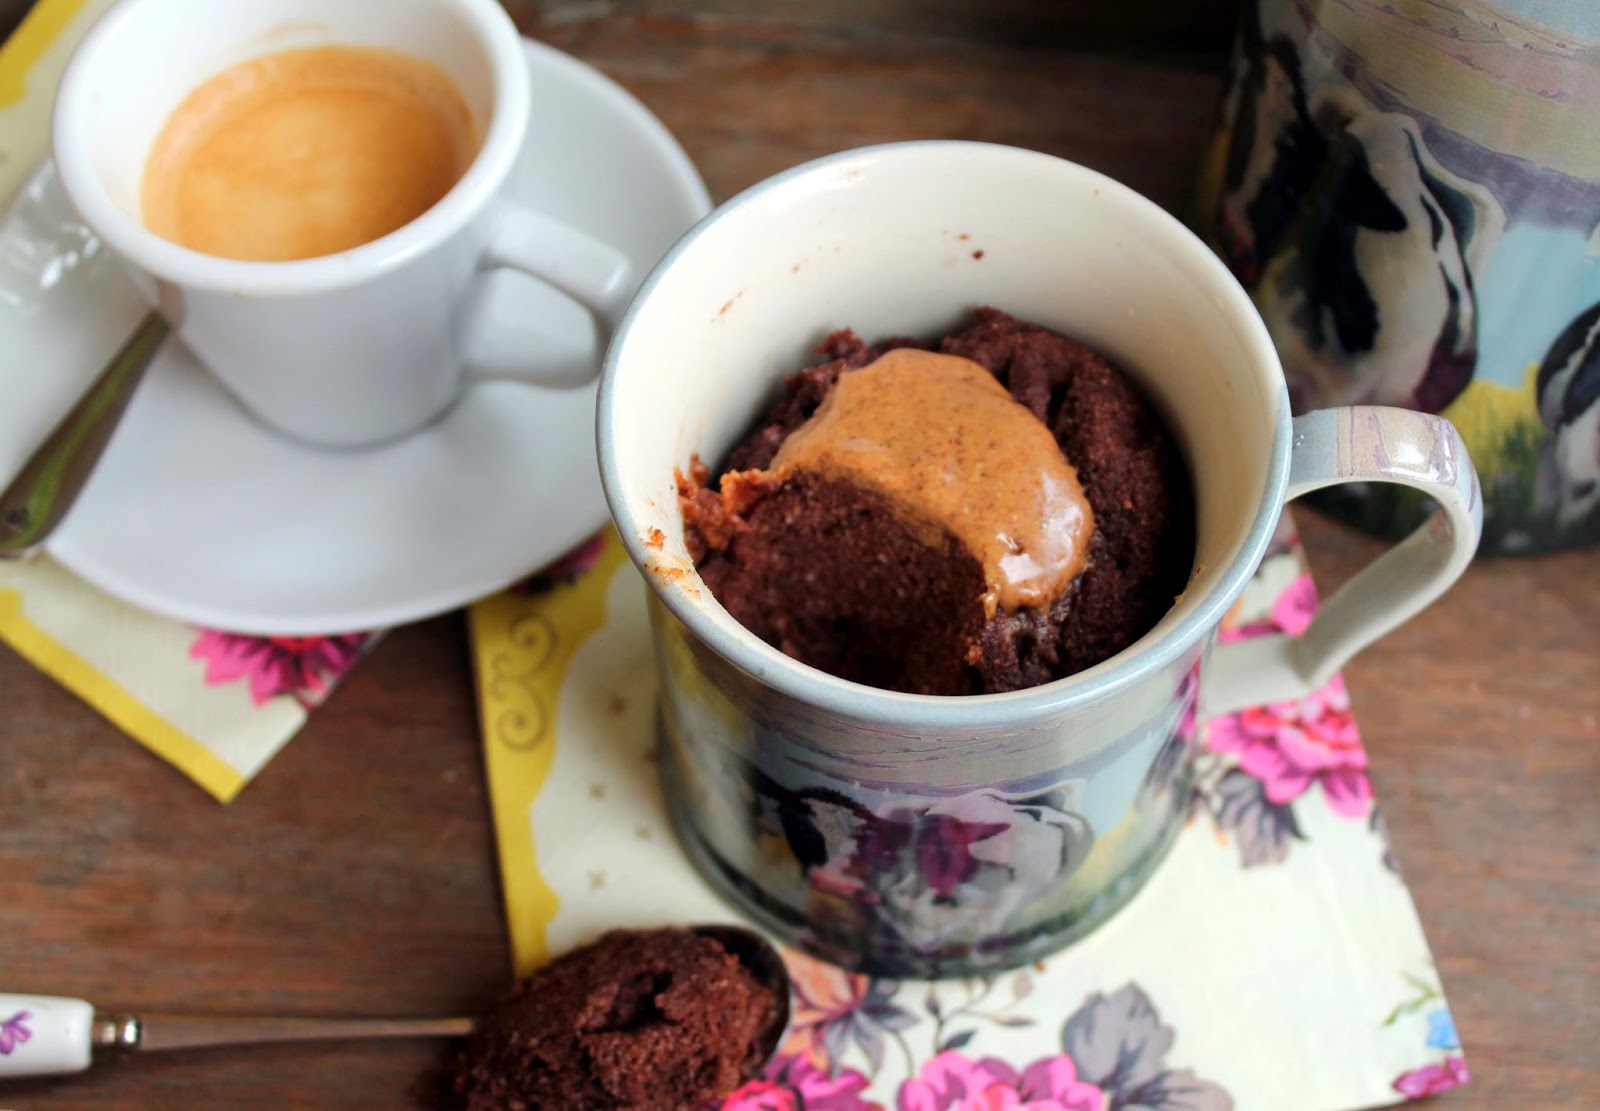
Baked in 60 Seconds - Paleo Chocolate Mug Cake


I bake! I bake everyday and having started the paleo diet, not being able to sample my cakes and baking was a worry. You have to test everything you bake for your guests in the B&B, right?! Cue, husband! My testing guinea pig. But I do find it hard to resist a muffin, or brown bread, or dare I say it...Chocolate Cake.


 I went to the health shop today and bought some coconut flour, and wanted to put it to use without having to bake a whole cake. I remember a Chocolate Mug Cake trend from a few years back, and I thought why not. It will be made in literally minutes, I'll have road tested the coconut flour.....and I'll have that chocolate hit I've been craving.  Having researched a bit about regular chocolate mug cakes, I've made mine using subsitutes for non-paleo ingredients. It's not melt in your mouth delicious and it certainly isn't as amazing as it would be using regular ingredients, lets be honest! But in terms of maintaining diet and getting that guilt free chocolate hit, it ticks every box. Its really coconuty, which I love. If I was a rule breaker I'd dollop some ice-cream on top..... I made my batter in a bowl and then poured into the mug, to avoid making a mess.


Makes 1 mug cake

Ingredients

  • 1.5 tbsp of coconut flour
  • 2 tbsp of cocoa powder
  • 2 tbp of honey
  • 4 tbsp of almond milk
  • 1 tbsp of coconut oil
  • 1/2 tsp vanilla extract
  • 1 large egg
  • 1 tbsp of almond butter


Method

  1. Beat the egg in the bowl, add rest of ingredients, except the butter, and whisk to incorporate everything.
  2. Pour the batter into your mug
  3. Place the almond butter in the centre of the batter
  4. Cook in the microwave for 60 seconds.
  5. Allow to rest for 30 seconds before digging in.

Friday, February 14, 2014

Perfect Valentine's Day Cakes


I was so indecisive this year about what to bake for my hubbie for Valentine's Day, and picking up some gimmick 'valentine' cake moulds in my local Lidl supermarket didn't help me with my choices. So I decided to just make two cakes. Valentine's falls on a Friday this year so we will worry about the diet on Monday.


I used the same basic cake recipe for both cakes, the recipe is adapted from an earlier blog from my Donna Hay adapted recipe http://serenasmediumrare.blogspot.ie/2013/04/quick-apple-blueberry-almond-cake.html


The first cake is a pink and white chocolate rose shaped cake, using a flower cake mould; and the second is my Triple Chocolate Heart cake. I think you will agree the heart cake totally stole the show. Here's how I made both cakes; they are surprisingly easy to make, and it was made start to finish during baby's morning nap!

Pink White Chocolate Chip Rose Cake


Ingredients

Cake Mix
  • 225g self raising flour
  • 165g caster sugar
  • 125ml milk
  • 125g soft butter
  • 1 tsp of vanilla extract
  • 2 large eggs
  • 3 drops of red food colouring
  • 100g of white chocolate chips
  • icing sugar to dust


Method
  1. Preheat oven to 160 degrees and grease the cake mould with some butter.
  2. In a food mixer, add all the dry cake mix ingredients and mix on low for a couple of seconds.
  3. Melt the butter in the microwave for a minute. Add the butter to a jug with the milk, eggs, vanilla, and food colouring.
  4. With the food mixer on slow, pour in the wet ingredients and mix until just combined, do not over mix.
  5. Scrape it into the cake mould and level it out evenly
  6. Bake in the oven for 45 mins.
  7. Check that the cake is fully baked with a skewer before removing from the oven (Insert skewer to centre of cake if it comes out clean it's done, if not bake for a further 5 mins and try again)
  8. Leave to cool on a wire rack in the mould until completely cooled.
  9. Invert the mould onto a plate to dislodge it from the mould and dust with icing sugar.


Triple Chocolate Love Heart Cake

Ingredients

Cake Mix
  • 220g self raising flour
  • 165g caster sugar
  • 125ml milk
  • 125g soft butter
  • 1 tsp of vanilla extract
  • 2 large eggs
  • 25g of cocoa powder
  • 100g of dark chocolate chips
  • 1 can of Dr Otker Chocolate flavoured cupcake buttercream
  • 50g of raspberries
  • Icing sugar to dust


Method
  1. Preheat oven to 160 degrees and grease the cake mould with some butter.
  2. In a food mixer, add all the dry cake mix ingredients and mix on low for a couple of seconds.
  3. Melt the butter in the microwave for a minute. Add the butter to a jug with the milk, eggs, vanilla.
  4. With the food mixer on slow, pour in the wet ingredients and mix until just combined, do not over mix.
  5. Scrape it into the cake mould and level it out evenly
  6. Bake in the oven for 45 mins.
  7. Check that the cake is fully baked with a skewer before removing from the oven (Insert skewer to centre of cake if it comes out clean it's done, if not bake for a further 5 mins and try again)
  8. Leave to cool on a wire rack in the mould until completely cooled.
  9. Invert the mould onto a plate to dislodge it from the mould.
  10. Frost the cake with the ready made chocolate buttercream, decorating however you like. I scattered the raspberries in a heart shape in the centre for the extra 'cheezy' factor.
  11. Dust with icing sugar.


Tuesday, November 12, 2013

Cheats Gold Star Chocolate Chip Cake


I baked this cake to mark my daughters six month 'birthday' last month. I was up against the clock with work in the B&B, and had told my family to drop by for cake, so I adapted my Quick Blueberry & Apple Cake (http://serenasmediumrare.blogspot.ie/2013/04/quick-apple-blueberry-almond-cake.html) recipe to made a super fast and easy chocolate 'birthday' cake. My little cheat in the process came in the form of pre-made butter cream frosting courtesy of Better Crocker - a lifesaver in last minute baking dilemmas. The frosting tasted great also which was a surprise. I would use it again in a bind hands down! 


This recipe is for your basic chocolate sponge, and in fact I use the same ingredients and quantities for my breakfast muffins for the B&B. How you wish to decorate the cake is totally up to you. I took the lazy approach with Dr Oetker edible gold glitter spray, Betty Crocker buttercream frosting, and Milky Way Chocolate stars. If anything else, its great practice for the actual '1st Birthday' cake. If you want to be super indulgent, double the recipe, bake 2 sponges and sandwich them together with chocolate buttercream frosting..........now that's a cake I'll be baking in the future...


Anyway, here's how I made the chocolate cake. It's seriously simple and yet impressive to look at, people would think you had been slaving for hours.

Ingredients

  • 200g self raising flour
  • 25g of cocoa powder
  • 100g of chocolate chips
  • 165g of caster sugar
  • 125ml of milk
  • 125g butter, melted 
  • 2 large eggs

Decoration

  • 1 12oz carton of Better Crocker buttercream frosting
  • 10 mini bags of milky way gold stars
  • can of gold food glitter spray


Method

  1. Preheat oven to 160 degrees and line a spring form tin
  2. In a food mixer, add all the  dry cake ingredients first and stir to combine
  3. Add  the eggs, butter, milk and vanilla extract to a jug and whisk to combine.
  4. Add the wet ingredients to the dry and mix until just combined (do not over whisk)
  5. Scrape it into the cake tin and level it out evenly.
  6. Bake in the centre of the oven for 45 minutes.
  7. Check that the cake is fully baked with a skewer before removing from the oven (Insert skewer to centre of cake if it comes out clean it's done, if not bake for a further 5 mins and try again)
  8. Leave to cool on a wire rack before decorating.
  9. Using a spatula, spread the buttercream out evenly over the cake.
  10. Dot the chocolate stars in a uniform fashion all over the cake.
  11. Spray the whole cake lightly with the gold spray. (optional of course, but in for a shilling, in for a pound)

Monday, August 19, 2013

Egg & Dairy Free Chocolate Cake


Because life's too short to be unable to enjoy cake!!!

When I had a guest at the B&B recently who told me that she had an allergy to eggs and dairy, I really wanted make something for her that she could enjoy. I had blueberry muffins and brown bread for other guests and I wanted my guest with the allergies to have the same sort of choice for breakfast as everyone else and not just have to be content with muesli soaked with orange juice.
Challenge!!! I told her for the next morning I would have a suitable breakfast choice for her. She told me that she likes coconut milk and almond milk and often substitute recipes with milk for these products.
I decided that banana pancakes would be possible using almond milk and a chocolate cake could possibly work well with coconut milk!!! Both were very sucessful. Here's the recipe I used for the chocolate cake. I must say every guest was enjoying them so much, I had to hide some back for the guest that they were intended for.

Ingredients
  • 170g of self raising flour
  • 170g caster sugar
  • 2 tbsp of cocoa powder
  • 230ml of coconut milk
  • 6 tbsp of sunflower oil
  • icing sugar to decorate.

Method
  1. Preheat the oven to 180 degrees.
  2. Grease an 8 inch cake tin with 1 tbsp of sunflower oil.
  3. Sift the flour, sugar and cocoa powder together.
  4. Mix the coconut milk and the sunflower oil together.
  5. Fold the wet ingredients into the dry ingredients.
  6. Spoon into the cake tin and bake in the oven for 20 to 25 minutes.
  7. Remove from the oven and allow to cool in the tin on a wire rack.
  8. Turn out the cake onto the rack then turnover onto a serving plate.
  9. Cut into equal slices and dust with icing sugar.

Thursday, March 28, 2013

Easter Chocolate Bark


I had my little niece over this afternoon and we went 'barking mad', making up all sorts of chocolate bark concoctions.


These barks are childsplay to make and can be made to suit grown-up tastes or also can be made using any type of sweets and candy that kiddies love. I found that marshmallows went down a treat with the little one!!!!


There really is nothing to this recipe; simply melt the chocolate and sprinkle over the ingredients you fancy. We chose for this particular outing to do a kiddies version and a more sophisticated version.


Marshmallow & Candy Bark


Ingredients

  • 30g of mini marshmallows
  • 1 packet of Nestle Smarties
  • 1 small packet of Cabury's Mini Eggs
  • 1 Cabury's Crunchie bar, crushed.
  • 250g of plain chocolate.


Method

  1. Break up the chocolate and put in a heat proof bowl, which is over some simmering water. Allow to melt fully.
  2. Get a baking tray and rub some oil dipped in kitchen towel.
  3. Then line the tray with baking parchment and rub the parchment paper with some of the kitchen towel soaked in oil
  4. Stir the marshmallows into the chocolate then pour the chocolate out over the tray evenly distributing it.
  5. (This is where the kiddies come in) Scatter the chocolate with the desired candy treats.
  6. Place the baking tray in the fridge for 1 hour to firm up, or if (like me) you are terribly impatient, place in the freezer for 20 minutes.
  7. The idea of the bark is to look a bit rustic and messy, so cut shards in at uneven angles for that homemade look.
  8. The chocolate bark will keep up to 3 days in an air tight container in the fridge; though I severely doubt they would last 3 hours.


Sweet Cranberry & Pistachio White Chocolate Bark

This more sophisticated bark is more for the adult audience and would be ideal to serve to guests with coffee at the end of a dinner party. The method is the same as outlined above, just substitute the white chocolate for the dark chocolate and omit the marshmallows and candies and instead use 1/2 cup of sweet dried cranberries and 1/2 cup of peeled chopped pistachio nuts.


You can experiment with whatever flavours you wish, using perhaps mint chocolate instead of plain chocolate; using cut up pieces of your favourite chocolate bars, any dried fruits or you could just go for full on nutty mode with nothing but nuts. The combinations and choices are endless.


Related Posts Plugin for WordPress, Blogger...