Sunday, January 26, 2014

Spicy Asian Beef Salad


The month of January is all about detox detox detox!! Gone are the mince pies, the selection boxes and the over indulging on Irish Cream Liqueur. Now tis the season to be healthy! Healthy for me doesn't have to mean boring. This Thai inspired beef salad is an exciting combination of fresh flavours, that is so tasty and satisfying you forget that its healthy.


The salad dressing is from Saba restaurant's cookbook. If you are ever in Dublin and in search of a great Thai/Vietnamese Restaurant, then you got to check Saba out. Everything on the menu is delicious. The recipe calls for 4 birds eye chilies in addition to everything else. I've left these out as I'm a bit of a wuss when it comes to chilies, but feel free to add them. I'm content with my chili flakes.

Serves 2

Ingredients

Beef

  • 1 steak, fillet or sirloin
  • 2 tbsp of mirin
  • 1 tbsp of palm sugar or brown sugar
  • 2 tbsp of rice wine vinegar
  • 2 spring onions, roughly chopped


Salad

  • 1 stack of rice noodles
  • 1 carrot
  • 50g of chopped roasted peanuts
  • 2 spring onions
  • 2 tbsp of chopped coriander


Salad Dressing

  • 2 shallots, peeled and chopped
  • 1 tsp of chili flakes
  • 3 cloves garlic, chopped
  • 1 tsp of coriander stalks
  • 3 tbsp of fish sauce
  • Juice of 1 lime
  • 1 tsp of sugar
  • 1 tsp of chili sauce
To serve
  • 1 tsp of chopped peanuts
  • 1 tsp of freshly chopped coriander
  • 1 lime cut into wedges


Method

  1. Firstly, you must marinate the steak. Combine all the steak ingredients in non metallic bowl and place the steak in the bowl. Allow to marinate for at least 1 hour.
  2. Pour Boiling water over the noodles and leave to soak for 30 minutes. Then drain and rinse in cold water and drain again.
  3. To make the salad dressing, simply add all ingredients into a mini food blender and blend until liquidised.
  4. Heat a frying pan on high, get it really hot then add the steak. Cook for 3 minutes each side and then set aside to rest for at least 10 minutes.
  5. Pour the marinade into a small saucepan and cook on high heat until its thickened and reduced.
  6. In a large bowl, combine the noodles with the rest of the salad ingredients. Pour over all the salad dressing and mix really well so that everything is coated.
  7. Divide the salad into 2 bowls.
  8. Cut the steak against the grain into strips as thinly as you can. Divide the steak pieces on top of each noodle bowl. 
  9. Pour over the thickened reduced marinade.
  10. Scatter with some more crushed peanuts, sliced spring onion and freshly chopped coriander. Serve with lime wedges.

Monday, January 6, 2014

Homemade Irish Liqueur Cream


I got this recipe from the BBC Website and I must say its absolutely awesome! I love Baileys, but this homemade version of Irish Cream Liqueur wins hands down and all my family and neighbours who received a bottle from me this Christmas agreed.  I brought the bottle to neigbours when visiting instead, and I also added to my homemade gift hampers for my mother and mother in law.


But this is not just a drink for Christmas, its way too tasty to reserve it for just once a year. It's a fabulous treat at the end of a meal at a dinner party, or even drop a sneaky bit into a coffee. Bliss!!!

 Here's the recipe, which I tweaked a little to my own taste, unable to source coffee syrup I used a cold strong espresso shot from my coffee machine and I added more chocolate sauce.


Ingredients


  • 350ml/12fl oz Irish whiskey
  • 1 tsp Camp coffee essence/or an espresso shot cooled if you cannot source the Camp.


Method

  1. Sterilise the bottles for the liqueur: wash in very hot water or on the hot cycle of a dishwasher. Preheat the oven to 160C/325F/Gas 3. 
  2. Place the bottles on a baking tray and dry in the oven for 10-15 minutes.
  3.  Leave to cool.
  4. Pour all the ingredients into a blender and blend on high for 30 seconds. 
  5. Add extra Camp or chocolate to taste.
  6. Pour into sterilised bottles and store in the fridge. (The liqueur will keep for up to two months.) Shake well before using.


Chinese Style Roast Chicken


New year, new roast chicken version!! Anyone who knows me, know that I'm obsessed with Roast Chicken and I roast a large (free range) chicken every single Sunday. Not only does it cover Sunday supper, but it provides for lunch and dinner the following day also.


Over Christmas I saw Gordon Ramsey do a 5 spice duck, and it inspired me to try a different take on my roast chicken. The result was a very flavorful bird and I added a glaze at the end, which gave it a wonderful bronzed glow and deliciously sticky skin!

Ingredients

  • 1 large free range chicken
  • 1 thumb size piece of ginger
  • 1 red chili, kept whole
  • 1 satsuma, pricked with a fork
  • 2 cloves of garlic, peeled
  • 1 lemongrass bulb, bruised
  • 3 tbsp of Chinese 5 spice
  • 2 tbsp of honey
  • 2 tbsp of soy sauce


Method

  1. Preheat the oven to 160 degrees.
  2. Stuff the chicken cavity with the chilli, ginger, garlic, satsuma and lemongrass.
  3. Rub the chicken generously with the 5 spice.
  4. Leave to marinate for 30 minutes.
  5. Roast in the oven for 1 hour.
  6. After 1 hour, turn the chicken upside down and roast for a further 30 minutes.
  7. Turn the chicken back over and roast for another 10 minutes.
  8. Whisk the honey and soy sauce together.
  9. Turn the oven up to 200 degrees.
  10. Pour over the honey and soy glaze and return to the oven, glazing the chicken every 5 minutes for 20 minutes.
  11. Take out of the oven and allow to rest for 15 minutes before carving.
  12. Serve with steamed greens and brown rice for a healthy roast chicken dinner.

Sunday, December 15, 2013

Pretty Meringue Decorations


Being a huge foodie, I hang edible treats on my Christmas tree every year and this year I decided to make some meringue circles. I must admit however that they only lasted the day and every single one of them was eaten before lights out. Nevertheless they are great fun to make with little ones and they look so pretty. You can make them whatever colour you like by adding your preferred food colouring to the finished meringue mixture, I chose pink as I'm super girly.


Ingredients
  • 4 eggs, room temperature
  • 220g caster sugar
  • Red food colouring
  • Pretty ribbon for hanging


Method
  1. Preheat the oven to 140 degrees
  2. Separate the eggs and put the egg whites in a food mixer with the whisk attachment
  3. Whisk the eggs for 5 minutes, on medium speed.
  4. Add the sugar little by little, increase the speed of the whisk and continue to whisk for 8-10 minutes, until you have stiff peaks.
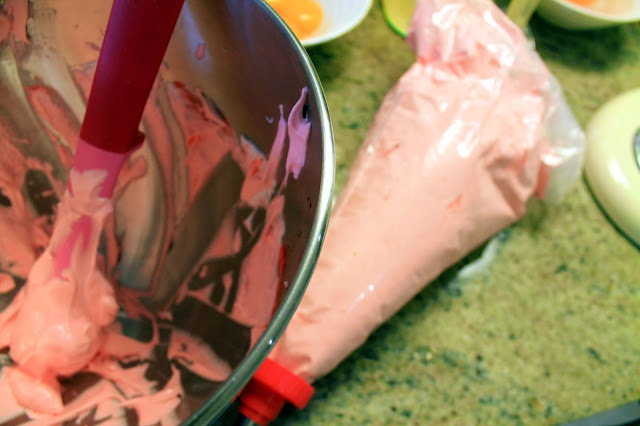
  5. Whisking slowly, add the colouring until you have reached the desired  colour.
  6. Put the meringue into a piping bag.
  7. Pipe out thick circles onto baking trays lined with baking paper.
  8. Place the trays in the oven and bake for 25 minutes
  9. Cool on a wire rack.
  10. Using a ribbon hang the meringues on your Christmas tree. Keep them away from the fairy lights if you can as the heat can melt the meringues.

Easy Peasy Mince Pies


I don't have a lot of time these days for baking and blogging, but these mince pies are all about the short cuts and are a doddle to make, so easy I just had to share the recipe. I'm a self proclaimed lover of store bought pastry, it makes everything so quick and easy.


 These pies are made using store bought pastry, but good quality pastry. The mince pie filling is also straight from a jar, but I'm using a luxury brand. Basically I'm all about the shortcuts once the very best store bought items are used. There then is nothing stopping you pimping up store bought ingredients. For example here I jazz up the mince filling with some clementine zest and chopped apple.

So on first glance of the pies you think 'oh I don't have the time to make those'; but read on and see how easy it is to make your own.


Makes 9 mince pies

Ingredients

  • 1 ready rolled premium quality shortcrust pastry
  • 1 jar of luxury mincemeat
  • 1/2 an apple, diced
  • Zest of 1 clementine 
  • 1 tbsp of milk
  • Butter, for greasing muffin tray
  • Icing sugar, for dusting


Method

  1. Preheat the oven to 180 degrees, and grease a muffin tin with butter
  2. Empty the mincemeat into a bowl and add the zest and the chopped apple and stir to combine.
  3. Roll out the pastry and using a round pastry cutter, cut out as many circles as you can. 
  4. With the scraps, re-roll and cut out some star shapes for the top of the pies.
  5. Place the pastry circles in the muffin holes and add the mincemeat filling. Do not be tempted to overfill them as they will burst and overflow when baked.
  6. Top each pie with the cut out pastry stars. Brush the stars with a little milk.
  7. Bake in the oven for 20-25 minutes until they are bubbling and golden brown.
  8. Cool in the tin on a wire rack for 5 minutes before removing from the rack and allowing to cool completely.
  9. Dust liberally with icing sugar and hey presto.


If you are visiting over the festive season, these are the prefect gift to bring your friends and family. Everyone loves homemade gift, especially ones that look like you were slaving in the kitchen for hours making. They need never know how easy and quick they were.

In a make ahead tip, you can freeze the pies in the muffin tray unbaked (covered with cling). Then just defrost overnight in the fridge before baking them.


Tuesday, November 12, 2013

Sika Lodge's Mango & Passionfruit Granola Cups


My homemade granola in Sika Lodge never lasts long, I am constantly restocking it, and jokingly telling my husband he's not to have it, it's for the guests.........much to his disgust!!These granola cups are made as a little treat for my guests, simple to assemble and very tasty, not to mention healthy.


*The mango & passionfruit puree is made from a can of mango slices, just whizzed with a hand blender and then cutting a passionfruit and mixing the seeds through the mango.


Follow my link to see how I make the homemade granola, but you can of course use store bought granola. http://serenasmediumrare.blogspot.ie/2013/07/sika-lodges-homemade-granola.html. I don't use exact quantities in my ingredients, it all depends on the number of granola cups you wish to make. Leftover ingredients can be kept in the fridge in air tight containers.


Ingredients

  • Granola
  • Greek Yogurt
  • Mango & Passionfruit Puree*
  • Whole, washed raspberries.


Method
  1. Spoon the granola into the base of glasses, I use wine glasses.
  2. Top the granola with a thick layer of Greek yogurt.
  3. The final layer is some mango puree, level it out evenly on top of the yogurt.
  4. Place a raspberry in the centre of each cup.
  5. For a final flourish, sprinkle a pinch of granola over the fruit
  6. Chill until ready to serve.


Cheats Gold Star Chocolate Chip Cake


I baked this cake to mark my daughters six month 'birthday' last month. I was up against the clock with work in the B&B, and had told my family to drop by for cake, so I adapted my Quick Blueberry & Apple Cake (http://serenasmediumrare.blogspot.ie/2013/04/quick-apple-blueberry-almond-cake.html) recipe to made a super fast and easy chocolate 'birthday' cake. My little cheat in the process came in the form of pre-made butter cream frosting courtesy of Better Crocker - a lifesaver in last minute baking dilemmas. The frosting tasted great also which was a surprise. I would use it again in a bind hands down! 


This recipe is for your basic chocolate sponge, and in fact I use the same ingredients and quantities for my breakfast muffins for the B&B. How you wish to decorate the cake is totally up to you. I took the lazy approach with Dr Oetker edible gold glitter spray, Betty Crocker buttercream frosting, and Milky Way Chocolate stars. If anything else, its great practice for the actual '1st Birthday' cake. If you want to be super indulgent, double the recipe, bake 2 sponges and sandwich them together with chocolate buttercream frosting..........now that's a cake I'll be baking in the future...


Anyway, here's how I made the chocolate cake. It's seriously simple and yet impressive to look at, people would think you had been slaving for hours.

Ingredients

  • 200g self raising flour
  • 25g of cocoa powder
  • 100g of chocolate chips
  • 165g of caster sugar
  • 125ml of milk
  • 125g butter, melted 
  • 2 large eggs

Decoration

  • 1 12oz carton of Better Crocker buttercream frosting
  • 10 mini bags of milky way gold stars
  • can of gold food glitter spray


Method

  1. Preheat oven to 160 degrees and line a spring form tin
  2. In a food mixer, add all the  dry cake ingredients first and stir to combine
  3. Add  the eggs, butter, milk and vanilla extract to a jug and whisk to combine.
  4. Add the wet ingredients to the dry and mix until just combined (do not over whisk)
  5. Scrape it into the cake tin and level it out evenly.
  6. Bake in the centre of the oven for 45 minutes.
  7. Check that the cake is fully baked with a skewer before removing from the oven (Insert skewer to centre of cake if it comes out clean it's done, if not bake for a further 5 mins and try again)
  8. Leave to cool on a wire rack before decorating.
  9. Using a spatula, spread the buttercream out evenly over the cake.
  10. Dot the chocolate stars in a uniform fashion all over the cake.
  11. Spray the whole cake lightly with the gold spray. (optional of course, but in for a shilling, in for a pound)

Related Posts Plugin for WordPress, Blogger...