Showing posts with label baking. Show all posts

Tuesday, April 25, 2017

Banana, Raisin & Cinnamon Loaf


Banana bread is so versatile. You can prepare all types of variations. The kids absolutely love this bread, and they always get a slice in their lunchboxes. It's also a great teatime treat, with lashings of butter, or toasted and topped with peanut butter.
I have been absent from the blog, as I am trying to find my feet with the new Bed and Breakfast season. This will be my sixth season, and every single year has been so different for me, because of my family life, and this year is no different. This year I have an extremely busy 18 month old as well as a vocal 4 year old to contend with, as well as all the work that comes with running a busy B&B, all by myself.


But now that I have settled into it and got a new routine going with the kids, I feel that my own normal life can continue and hopefully that means more time for blogging once again.
So starting back after a couple of months off with a quick and easy baking recipe. I'm killing two birds with one stone really, as I made this bread for my B&B guests for tomorrow morning.
Banana bread is a real crowd pleaser and I find it always tastes better on day two, which is why I made it the evening before the breakfast run.
There are hundreds of banana bread recipes out there, but this one is probably one of the quickest and easiest of them, oven ready in five minutes. Then let the oven do all the work.


Ingredients

  • 250g plain flour
  • 1 level tbsp baking powder
  • 1 lvel tbsp ground cinnamon
  • 2 large eggs
  • 125g soft butter
  • 125g caster sugar
  • 75g raisins
  • 1 tbsp demerera sugar
  • 3 bananas (2 mashed, 1 sliced length ways)

Method

  1. Line a 2lb loaf tin, or oil a silicone loaf tin. Preheat the oven to 180 degrees.
  2. In a bowl, add the eggs, butter, mashed bananas, and sugar.
  3. Using an electric hand blender, beat the mixture well.
  4. Sieve in the flour, baking powder and cinnamon.
  5. Add the raisins and fold into the mixture.
  6. Pour evenly into the loaf tin.
  7. Top the loaf with slices of banana down the centre of the loaf and sprinkle with the demerera sugar.
  8. Bake in the centre of the oven for 50 minutes. Place of a wire rack to cool
  9. Allow to cool completely in the tin before turning it out.

Thursday, February 23, 2017

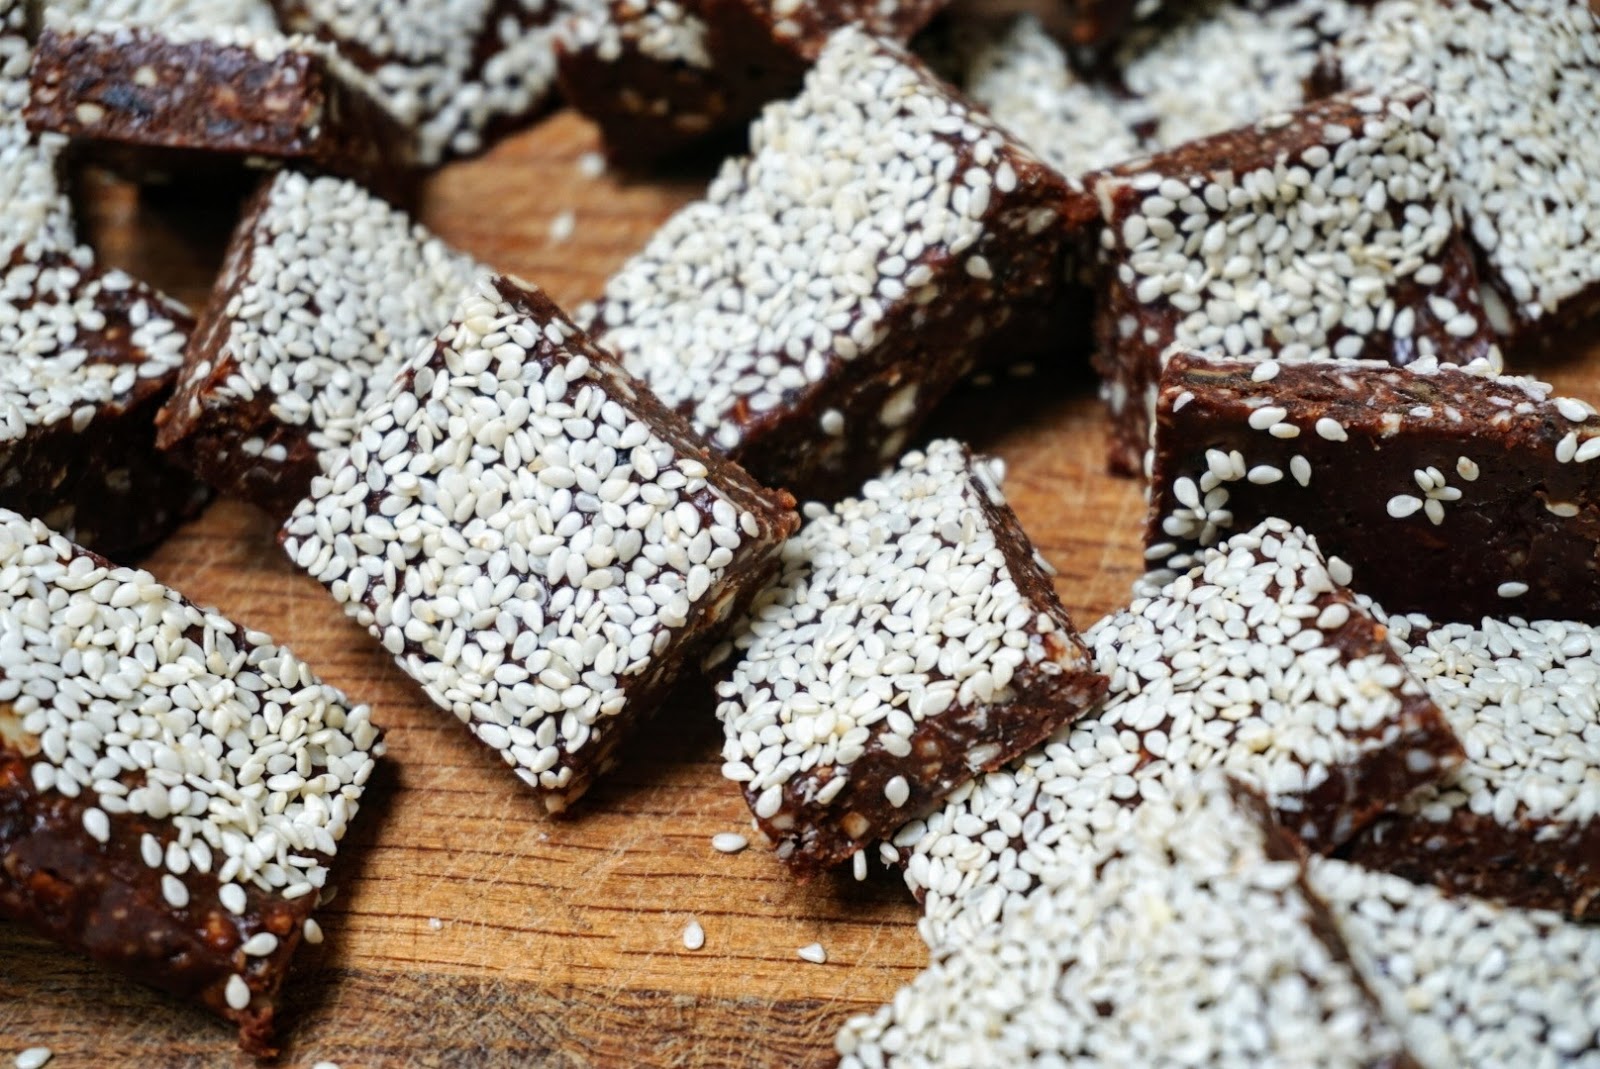
"Chocolate" Energy Bars


These energy bars are a variation on my Nut Free Energy Balls. Their very health ingredients help give a slow release of energy along with a tasty chocolatey hit. I've research Maca powder lately after seeing it in my local Aldi supermarket. Apparently it has a positive effect on our hormone levels, it's an energy booster, along with being very rich in nutrients. It's high in vitamin B, C, & E; and it has a higher level of calcium than milk.  I think I'm onto a new favorite in my health food cupboard, along with my raw cocoa powder and chia seeds.


I highly recommend making these, they are delicious and the kids love them. Perhaps too good as I've snuck to the freezer at least for four times today for a sneeky bite.


Ingredients

  • 9oz pitted dates
  • 4 oz raw almonds
  • 2 tbsp of coconut oil
  • 2 tbsp of maple syrup
  • 1 tbsp of maca powder
  • 1 tbsp of  raw cocoa powder
  • 1  tsp of salt
  • 2 tbsp of desiccated coconut 
  • 1-2 tbsp of sesame seeds


Method


  1. Pulse the almonds in a food processor until they are broken down.
  2. Add the remaining ingredients and blender until the mixture forms a large dough ball.
  3. Turn out the ball onto a swiss roll tin lined with baking paper, and flatten out into a thin even layer.
  4. Scatter with the sesame seeds and transfer to the freezer for 30 minutes to firm up.
  5. Cut into squares and store either in the freezer or the fridge. (I like them hard and chewy out of the freezer).


Monday, February 6, 2017

Fig & Hazelnut Cake - The Perfect Weekend Indulgence


I made this cake back in October and it got rave reviews from everyone who ate it and I promised myself that I would make it again and blog it. Well October was ages ago, and between this and that I never got the chance. But this week was one hell of a week. We ended up staying in hospital for 3 days with my little small dude, Fionn. He's fine and home and everything, but it was a tough week. So on this cold rainy Saturday, Fionn is napping, Aoife's gone on a play date, and Alan is gone DIYing. So  for me the ultimate indulgence is light candles, turn down the lights, turn on some tunes and bake an awesome cake. For me baking is so relaxing! I love it. I decided I'd waited long enough to recreate that fig cake of October and I seized the perfect opportunity to bake.


The cake batter is a very simple one. I picked it up from Donna Hay. I have previously blogged a few different versions of this quick and simply cake, most notably my Quick Apple & Blueberry Cake.  I found figs are a great baking companion, and the hazelnuts are a match made in heaven. While the addition of the honey, while the cake is warm lends to the cakes sweetness and glossy finish. All in all, it's a great cake for an afternoon cup of tea, or equally warmed with a spoon of vanilla ice-cream for a yum dinner party dessert, cut and served at the table.


Ingredients

  • 225g self raising flour
  • 170g brown sugar
  • 125g soft butter
  • 125ml milk
  • 2 large free range eggs
  • 3 fresh figs, sliced
  • 1 tbsp chopped hazelnuts
  • 1 tbsp demerera sugar
  • 1 tbsp of runny honey


Method


  1. Preheat the oven to 160 degrees
  2. In a mixing bowl, cream the sugar and the butter with a hand held blender
  3. Add the eggs, one at a time, mixing well. 
  4. Sieve the flour, and add the milk, and mix until combined
  5. In a 8inch diameter cake tin with a loose bottom, line with parchment and grease the sides with soft butter.
  6. Add the cake mixture to the tin. Top with the figs and the hazelnuts.
  7. Sprinkle the top with demerera sugar.
  8. Bake in the centre of the oven for 45 minutes, or until a skewer comes out clean.
  9. Remove from the oven and allow to cool completely on a wire rack.
  10. While the cake is still warm, drizzle with the honey.


Wednesday, November 30, 2016

Maple Spiced Sweet Potato Muffins


It's beginning to smell a lot like Christmas.....

I've been absent of late from blogging. I had  to take a time out towards the end of our busiest B&B season ever. Things got very hectic and on top of doing Bed & Breakfast 24/7, I also have the two little monsters to look after. So in the end, something had to give and alas I'm afraid it was my blog! Now that we have closed for the season and I had some time to recuperate, I delighted to be back experimenting, photographing, tasting, and blogging all my favourite recipes!


And this is a wonderful recipe to return with!! These muffins, though not intentional, and bursting with Christmas tastes and smells! And with December starting tomorrow, this recipe is a highly appropriate come-back!


Last night I put down too many baked sweet potatoes for the dinner. Here I was thinking one of the kids would finally fall in love with baked sweet potatoes, instead of eating mashed regular potatoes. To no surprise, there was no such luck, leaving me with two spare baked sweet potatoes.


I let them cool fully and put them in the refrigerator over night. I remembered last winter experimenting with butternut squash muffins, and they tasted great. Howerver I totally forgot to write down how I made them, so I thought, with these spare baked sweet potatoes, I should really try to recreate that recipe again, and this time record the ingredients.


The spices used in the recipe and wonderfully Moorish and the use of oil and maple syrup give the muffins a great moistness. My kids adore muffins, and these muffins are a great way of hiding sweet potatoes in their diet. They are going to be the perfect lunchbox snack.


Ingredients

Makes 12 muffins


  • 225g plain flour
  • 1 tsp baking powder
  • 1 tsp ground cinnamon 
  • 1/2 tsp nutmeg
  • 1/2 tsp all spice
  • 140g light brown sugar
  • 75g raisins
  • 175ml milk
  • 30ml maple syrup
  • 60ml olive oil
  • 1 tsp salt
  • 1 egg
  • 150g of cooled baked sweet potato
  • 2 tbsp of mixed seeds


Method

  1. Preheat the oven to 180 degrees.
  2. Line a muffin tray with muffin cases.
  3. Sieve the flour, baking powder, and spices into a large bowl.
  4. Add the brown sugar  and raisins and stir to combine.
  5. In a jug, add the egg, mashed sweet potato, maple syrup, and milk and whisk thoroughly to combine.
  6. Make a well in the centre of the dry ingredients and pour in the wet ingredients from the jug.
  7. Stir until all is combined and a batter is formed.
  8. Divide the batter evenly into the 12 muffin case. Scatter each muffin with some mixed seeds.
  9. Bake in the oven for 25 minutes.
  10. Remove from the oven and place on a cooling rack. 
  11. While the muffins are still hot, brush the tops of the muffins with some maple syrup. This with help make the tops sticky and crunchy and the maple syrup will also soak into the hot muffins.

Monday, August 15, 2016

Rhubarb, Apple & Ginger Jam Muffin Surprise


I call these buns, Muffin Surprise, because you can't tell what type of muffin you are eating until you sink your teeth into one. These are a very simple muffin mixture recipe, with my secret ingredient.....my divine homemade Rhubarb, Apple & Ginger Jam.


I cannot get enough of this jam, I'm literally obsessed. Not content with having this dreamy jam on scones and toast, I love to slather my pancakes with it, my french toast,heat it and top is over vanilla icecream (my fave), and now sneaking a spoonful into my muffin mixture.


Here's how to make the Rhubarb Apple & Ginger Jam

Ingredients


  • 500g rhubarb, diced
  • 300g of peeled chopped apple
  • 1 inch piece of peeled ginger, diced
  • 800g of granulated sugar
  • 2-3 tbsp of water


Method

  1. Place all the ingredients in a large saucepan and bring to the boil. Simmer gently for 20 minutes or so until the jam has thickened. It will thicken further when cooled. Pour into sterilized jars (I sterilise the jars in the dishwasher). 

See!!! It's that easy, no excuse not to make your own jam, seriously!!


Rhubarb, Apple & Ginger Jam Muffin Surprise

Ingredients


  • 225g plain flour
  • 1 tsp of baking powder
  • 160g sugar
  • 170ml milk
  • 1 egg
  • 75g melted butter
  • Rhubarb Jam


Method

  1. Preheat the oven to 180 degrees and line a muffin tray with paper cases.
  2. Sieve the flour and the baking powder into a bowl. Add the sugar
  3. Whisk the egg, milk and butter in a jug.
  4. Make a well in the dry ingredients and pour in the wet ingredients. Stir through until incorporated into a muffin batter
  5. Put 1 tbsp of batter in each muffin case, followed by half a tsp of jam in each case, then divide the remaining batter into all the cases.
  6. Bake in the centre of the oven for 22 minutes.
  7. Remove from the oven once baked and cool on wire rack


(Tip you can use shop bought jam of any description for this recipe to substitute the homemade jam)


Thursday, March 10, 2016

Banana & Maple Granola Cups


I was inspired to make these cups after seeing a video on Proper Tasty facebook page. They are a great inventive way of getting some slow releasing energy oats into you the morning, as well as looking oh so pretty.In addition to being nutritious and good looking, they are very versatile and keep in the fridge in a sealed airtight container for up to a week.


Even though I was inspired by the video in the above link, I did change a few ingredients and also part of the cooking method. I found from cooking the cups in the muffin trays they had a slightly 'soggy bottom', so for a final five minutes in the oven, I took them out of the muffin tray and turned them upside down on a baking sheet, to crisp up the base of the cups, so no soggy bottoms in sight!

I'm very excited to get my guests reviews on them when I open our bed & breakfast Sika Lodge next week.


Here's how I made them

Makes 12 cups

Ingredients

  • 250g rolled oats ( I used jumbo oats)
  • 150ml pure maple syrup
  • 2 mashed bananas 
  • 1 tsp vanilla extract
  • 1 tsp cinnamon
  • 1 tsp salt


Example of toppings


  • 0% fat strained Greek Yogurt
  • Berries
  • Mango puree
  • Compote
  • seed mix
  • Stewed fruits


Method

  1. Mix the maple syrup, vanilla extract, and bananas thoroughly.
  2. Preheat the oven to 180 degrees.
  3. In a large bowl, mix together the oats, cinnamon,and salt.
  4. Add the wet ingredients to the dry ingredients and stir until well combined.
  5. Oil the muffin holes of a 12 muffin tray.
  6. Divide the mixture evenly between the muffin holes and using the back of a spoon spread the mixture up the walls of the muffins holes, creating the cup shape.
  7. Bake in the oven for 20 minutes.
  8. Remove from the oven and the muffin tray and invert the granola cups on a baking sheet. 
  9. Bake for a further 5 minutes to crisp up the bottom of the cups.
  10. Remove from the oven and allow to cool completely.
  11. Add a generous dollop of thick Greek yogurt and top with your choice of berries, compote, dried fruit or mixed seeds. It's your call!
Tip: A drizzle of honey certainly wouldn't go astray either on these!!

Friday, February 5, 2016

Homemade Chocolate Spread - A Healthy Nutella Alternative


I've been absent on the blog lately with two babies to take care of and home renovations to complete before re opening the bed and breakfast. Today is Nutella Day so I  thought what better day to write my first blog post of 2016. As usual the start of a new year,  a new healthier eating plan (well good intentions anyway). Here is a an indulgent chocolate spread, but being homemade, it's ten times better than the shop bought alternative. Everything in moderation, right!?


We love Nutella in this house and  I'm constantly including it in baking recipes, especially for the Bed and Breakfast. Last summer, through trial and error, I developed my own take on Nutella, recreating it from scratch at home. It is indulgent, but gives me piece of mind to know that I made it at home myself so I know exactly what's in it. Here is the recipe and all the photos that have me drooling today.


Ingredients


  • 150g of hazelnuts
  • 150g of dark chocolate, melted
  • 2 tbsp of vegetable oil
  • 3 tbsp of icing sugar
  • 1 tsp of vanilla extract
  • 1/2 tsp of salt
  • 1 tbsp of cocoa powder


Method


  1. Preheat the oven to 180 degrees.
  2. Place the hazelnuts on a roasting tray and roast the hazelnuts for 10 minutes, until they have browned and blistered.
  3. Once the hazelnuts are roasted, put in the tablecloth and rub vigorously to remove as much of the skins as possible.
  4. Place the toasted hazelnuts in a food processor and blend to a paste.
  5. Add the remaining ingredients, and blend until smooth. The mixture will be a bit grainy, not as smooth as regular chocolate spread, but that is the charm of this spread.


Saturday, July 11, 2015

Lemon Curd & Blueberry Tarts - The Fastest Tarts in the West


I had to think twice whether or not to post this recipe as it's nearly too easy, and hardly a recipe at all. But then I thought why not show how a bit of quick thinking can help transform just 3 ingredients into something truly scrumptious.

Shop bought ready rolled puff pastry is an absolute godsend! The possibilities for baking recipes are endless. Here I'm using my own homemade lemon curd, but you can just as easy buy a good quality jar of lemon curd.


 The lemon and blueberry flavours are a match made in heaven, but you could always subsitute the blueberries for raspberries if you wish.


I made these tarts this morning for my Bed and Breakfast guests. I'm usually up against the clock in the morning preparing the breakfast, but as these tarts require minimum effort, they were the perfect choice for early morning baking!

Ingredients


  • 1 sheet of ready rolled puff pastry
  • 12 tsp of lemon curd
  • 24 blueberries


Method

  1. Preheat the oven to 180 degrees.
  2. Line a baking sheet with baking paper.
  3. Stamp out 12 circles of pastry rounds
  4. Place 1 tsp of lemon curd in each pastry disc, followed by 2 blueberries.
  5. Pinch up the sides of the circle, so the lemon curd doesn't escape.
  6. Spread the discs out of the baking sheet and bake in the oven for 14-15 minutes.
  7. Allow to cool completely on a wire rack when baked.


Monday, May 25, 2015

Moist n' Sharp Blueberry & Lemon Curd Loaf


I made this loaf cake for my B&B guests, but I must confess there is only half a loaf left. WARNING: This cake is totally addictive. The buttermilk helps lift the cake to a crazy level of moistness!! And the lemon curd, gives the cake a super sharp hit. With summer upon us, this is the perfect breakfast/elevenses/afternoon tea/ any time cake!!! The blueberries and lemon curd are a match made in heaven.


When I asked my husband to test a slice of this cake and told him I made it up as I went along, he said 'you need to write down what you did immediately, and do it again!!' So here it is!


Note: You can use good quality shop bought lemon curd, but I made my own, using Clodagh McKenna's recipe from her book Homemade. My B&B guests swoon over that lemon curd. I'll post that recipe up shortly.


Ingredients

  • 225g plain flour
  • 110g blueberries
  • 170g caster sugar
  • 130ml buttermilk
  • 1 egg
  • 125g of butter
  • 3 tbsp of lemon curd
  • 1 tbsp of almond flakes
  • 1 tbsp of demerara sugar
  • 1 tbsp of baking powder


Method

  1. Preheat the oven to 165 degrees.
  2. Sieve the flour and the baking powder into a mixing bowl. Add the sugar and stir.
  3. Melt the butter and add to the buttermilk. Break an egg into the butter/buttermilk mixture and whisk to combine.
  4. Pour the buttermilk mixture into the dry ingredient and stir to combine. Add in the blueberries and stir just enough to combine.
  5. Grease a loaf tin and add half the mixture to the tin. Spread it evenly.
  6. Spread the lemon curd over the mixture and cover with the remaining cake mixture.
  7. Scatter the cake with the almonds and sprinkle with the demerara sugar.
  8. Bake in the oven for 55 minutes.
  9. Allow to cool completely in the tin, before turning out.

Related Posts Plugin for WordPress, Blogger...