Showing posts with label cakes. Show all posts

Wednesday, March 16, 2016

Chocolate Chip Cupcakes with St. Patrick's Day Frosting


We love St Patrick's Day in this house. It's always a big family day and an excuse to eat some lovely Irish food, watch the parade in town and maybe (just maybe) have a little tipple (or two).This year we have the added bonus of babysitting my two little nieces also, so we will be baking these cupcakes in the morning for their arrival!


I trial-baked these cupcakes on Sunday with my daughter to share with her cousins on a playdate. We made 12, and they went down so well that I actually didn't have one to myself at all. I had to rely on family taste reviews to let me know that they were good. Very good I'm told. Too good my mother said!! I used Rachel Allen's recipe for chocolate cupcakes from her book Cake; and just added 100g of chocolate chips. I tried to make the frosting as green as I could. I ended up using a full tube of green gel food colouring.


Where ever you are celebrating St Patrick's Day, I hope it's a safe and fun day for everyone. Fingers crossed for good weather. (nothing worse than parade watching in an unbrella jungle)

Ingredients

Cupcakes

  • 100g soft butter
  • 150g of vanilla sugar (sugar in a jar with vanilla pods)
  • 2 large eggs
  • 125ml milk
  • 175g plain flour
  • 2 tsp baking powder
  • pinch of salt
  • 25g cocoa powder
  • 100g chocolate chips
St Patrick's Day Frosting
  • 100g very soft butter
  • 225g icing sugar, SIFTED
  • 30ml milk
  • 1 tsp of vanilla extract
  • 1 tube Dr Oetker green food colouring (or any colour). The more colouring you add the deeper the colour of your icing.


To Decorate

  • Chocolate stars (or smarties, chocolate shavings, sprinkle, to name a few)


Method

  1. Preheat the oven to 180 degrees and line a muffin tray with 12 paper cases.
  2. Using a hand whisk (or electric) cream the butter, add the sugar and whisk until light and fluffy.
  3. Whisk the eggs in a bowl and then slowly add them to the butter, whisking all the time.
  4. Pour in the milk and beat until mixed.  
  5. Sift in the flour, cocoa powder, salt, and baking powder.
  6. Add the chocolate chips and gently fold stir until the flour mix is incorporated in.
  7. Divide the bun batter between the 12 cases and then bake in the oven for 20 minutes.
  8. Allow to cool on a wire rack in the tray for 5 minutes, then remove and cool completely. They need to be completely cooled before icing, otherwise you will have a runny mess.
  9. To make the icing, whisk all the icing ingredients together, either using a hand held whisk or an electric mixer.
  10. You can decorate using a piping bag, but I prefer a more 'homemade, rustic' finish and used a warm palate knife.
Enjoy and Happy St. Patrick's Day!!!


Wednesday, January 21, 2015

Banana Oats & Apricot Muffins - Thumbs Up from Toddlers


These buns are made with my little toddler in mind, however they are not just for busy growing little kiddies. They are a great pre or post work out treat for us big kids too. The addition of the sunflower oil makes the buns incredibly moist, and the mashed bananas give a fabulous flavour. I'm using apricots here, but raisins or dried blueberries or dried cranberries work equally well.

When it comes to Aoife's 3pm snack time, and she see me pulling one of these buns from the tubberware box, she goes absolutely crazy and it's a job to lift her into the chair she's going so mad with excitement. This to me means that they have gotten the toddler thumbs up.


Ingredients

  • 2 ripe bananas, mashed
  • 50ml of sunflower oil
  • 1 egg
  • 55g of melted butter
  • 1 tsp of vanilla extract
  • 100g of plain flour
  • 100g of caster sugar
  • 50g of rolled oats
  • 1/4 tsp of bicarbonate soda
  • 1/2 tsp of baking powder
  • 55g of chopped dried apricots


Method


  1. Preheat the oven to 180 degrees and line a bun tray with paper bun cases.
  2. Get 2 bowls. In one bowl add the mashed bananas, sunflower oil, egg, butter, and vanilla extract. Stir very well to incorporate everything.
  3. In the second bowl, sift the flour, baking powder, and bicarbonate soda. Add the oats and the caster sugar and stir well. 
  4. Make a well in the centre of the dry ingredients and pour in the wet mixture. Fold in the wet ingredients to the dry ingredients to make sure everything is thoroughly mixed.
  5. Add the apricots at this point (any dried fruit will do), and stir again to distribute the fruit.
  6. Using two spoons, fill each muffin case to three quarters full.
  7. Sprinkle with a few porridge oats if you wish.
  8. Bake in the oven for 20 minutes and then cool on a wire rack.
  9. These buns freeze very well and just need a couple of hours to defrost.


Thursday, September 11, 2014

Quick Apple & Cranberry Cake


If there is one recipe I am doing to death and constantly chopping and changing the ingredients is my Apple Blueberry and Almond Cake Apple Blueberry & Almond Cake. This recipe is so versatile, you can add any berries you wish, or dried fruits or even chocolate chips. The basic cake mix is my 'go-to' recipe for a very quick and light fluffy cake.


Last week all my garden berries were ripe for picking. I had a tonne of cranberries. In fact more cranberries than than any other types of berries put together. I made a cranberry relish Quick n'Lazy Cranberry Raisin & Walnut Relish, a strawberry and cranberry balsamic sauce for the pancakes and french toast for the B&B; and today I made orange, cranberry and walnut muffins similar to Festive Cranberry, Pecan and Orange Muffins.


Over the weekend I used my basic sponge recipe to make a cranberry and apple cake. Simple to make! The cranberries are extremely tart and sharp and worked quiet well in this sweet recipe.


Ingredients

  • 225g self raising flour
  • 165g caster sugar
  • 125ml milk
  • 125g soft butter
  • 1 tsp of vanilla extract
  • 2 large eggs
  • 100g of cranberries (fresh or frozen)
  • 1 apple, sliced thinly
  • Demerara sugar for sprinkling
Method
  1. Preheat oven to 160 degrees and line a spring form tin or use a silicone cake tin
  2. In a food mixer, add all the cake mix ingredients and mix on low until combined
  3. Scrape it into the cake tin and level it out evenly
  4. Top with the apple slices evenly and scatter over the cranberries
  5. Finally sprinkle with the demerara sugar and bake in the oven for 45 mins.
  6. Check that the cake is fully baked with a skewer before removing from the oven (Insert skewer to centre of cake if it comes out clean it's done, if not bake for a further 5 mins and try again)
  7. Leave to cool on a wire rack before gobbling the whole thing up.

Wednesday, July 30, 2014

Courgette & Walnut Bread


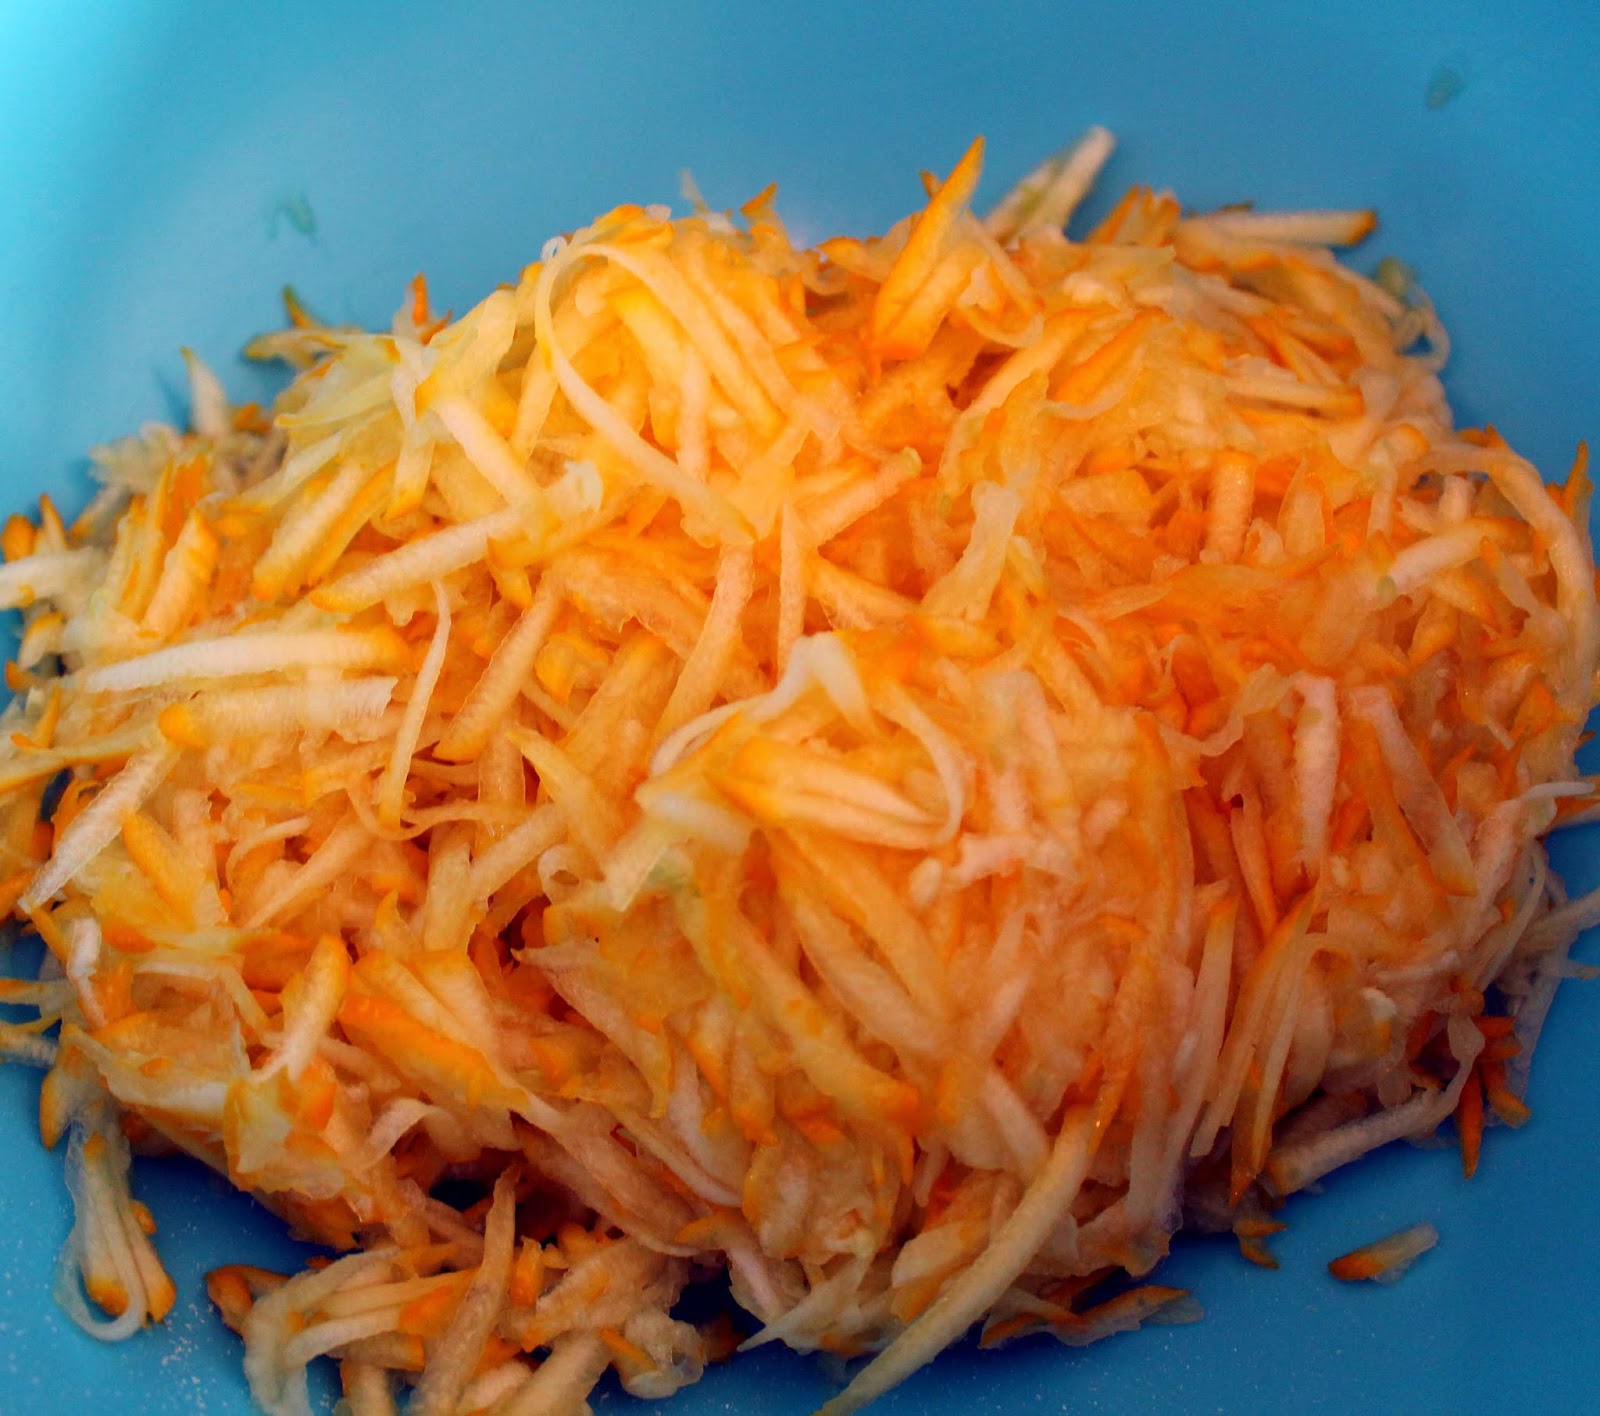
I love baking bread, but with little time on my hands I usually go for quick prepping bread, nothing usually that requires, yeast, proving and rising. Hence the bread I mostly make is soda bread, carrot bread, banana bread, and now more often Courgette Bread; zucchini, for our friends across the pond. 


I have been testing this recipe for some time now, trying to find the best way of baking the bread. I have tried a super fast food processor version and also a version by hand. I must say the version by hand is probably nicer than the food processor method, as the walnuts and and the shreds of courgette still give a bite. 


I was very fortunate last night that my brother Keith dropped by an amazing whopper of a yellow courgette; big enough for two loaves of bread. Keith was the one in the family blessed with green fingers. He grows potatoes out of old boots, chili plants, anything he touches in the garden grows. I on the other hand have a great knack of killing even store bought basil plants. So I was very grateful to receive this home grown treat. 

So here is my tried and tested recipe for Courgette & Walnut Bread.


Ingredients
  • 500g of grated courgette (zucchini)
  • 1 lb of plain flour
  • 1 1/2 tbsp baking powder
  • 350g of caster sugar
  • 2/3 cup of vegetable oil
  • 130g chopped walnuts
  • 1 tbsp of cinnamon
  • 4 eggs


Method
  1. Preheat the oven to 180 degrees and line 2 1lb loaf tins
  2. Get 2 mixing bowls. In the first bowl add the grated courgette, eggs and oil.
  3. Add all the remaining dry ingredients to the second bowl, and mix well.
  4. Add the dry ingredients to the wet ingredients and mix well.
  5. Divide the bread mixture between the two loaf tins.
  6. Bake in the oven for 65 minutes. Turn out of a wire rack and cool.
  7. This bread taste even better the following day and keeps very well for up to 4 days as the grated courgette keeps the bread superbly moist.


Sunday, March 30, 2014

Mother's Day Lemon Drizzle Cake


Happy Mother's Day to all the mums out there! I hope your nearest and dearest are looking after you on this special day. If there's anyone out there who didn't nip to the shops for a box of chocolates their moms, fear not, help is here. This is such an easy peasy lemon drizzle cake, you can whip it up in no time and mum will feel super special that you made an effort and baked her a cake.


It's my very first mothers day today, which I think is a big deal, as last mothers day I was two weeks away from giving birth, and I felt cheated that I couldn't celebrate mothers day (for myself, of course I spoilt my own amazing mammy!).


Even though it is my first mother's day, I actually don't think I can now visualise what life was like without being a mom. It's the most important thing in my life and equally my mom is one of the most important people in my life and I always try to find ways to tell her how much I appreciate her and how much she means to me and my little girl.  The old saying 'where would we be without our mothers' comes to mind, and I think never a truer thing has be said.


So here is my lemon drizzle cake that I just made up really as I went along. With all my cakes I am using my basic cake mix quantities that I owe thanks to Donna Hay for. Then I tweak it to make different types of flavour cakes. My cake cracked a lot on the surface and normally I would be very upset about this, but it suited my lemon drizzle cake perfectly as it means that the sugary lemony syrup gets to travel down throughout the cake permeating the cake with yet more lemony fragrance.

Ingredients

  • 225g of self raising flour
  • 165g of caster sugar
  • 120ml of milk
  • 5ml of lemon juice
  • 1 tsp of sicilian lemon extract
  • zest of 2 lemons
  • 2 large eggs
  • 125g of butter


Drizzle

  • 85g of caster sugar
  • juice of 1 large lemon
Method
  1. Preheat oven to 165 degrees celsius 
  2. Prepare your cake tin. I'm using a silicone cake tin, for an easy life. I think they are great!
  3. In a food mixer, sift the flour and sugar into the bowl. Add the zest.
  4. In a jug add the egg, juice and milk. 
  5. Melt the butter for 1 minute in the microwave.
  6. Add the butter and the lemon extract to the jug and whisk to combine.
  7. On a slow setting in the mixer, mix the flour and sugar and slowly add the wet ingredients.
  8. Mix only until combined, do not over mix.
  9. Add the batter to the cake tin and bake in the oven for 45 minutes.
  10. When the cake is baked, remove from the oven and cool on a wire rack
  11. When the cake is cool, make the drizzle by whisking the caster sugar and lemon juice together.
  12. Pour over the cake, ensuring it leaks into all the crevices of the cake.
  13. Serve with a hug and a cup of tea.
Happy Mothers Day!!!!!!!!


Friday, February 14, 2014

Perfect Valentine's Day Cakes


I was so indecisive this year about what to bake for my hubbie for Valentine's Day, and picking up some gimmick 'valentine' cake moulds in my local Lidl supermarket didn't help me with my choices. So I decided to just make two cakes. Valentine's falls on a Friday this year so we will worry about the diet on Monday.


I used the same basic cake recipe for both cakes, the recipe is adapted from an earlier blog from my Donna Hay adapted recipe http://serenasmediumrare.blogspot.ie/2013/04/quick-apple-blueberry-almond-cake.html


The first cake is a pink and white chocolate rose shaped cake, using a flower cake mould; and the second is my Triple Chocolate Heart cake. I think you will agree the heart cake totally stole the show. Here's how I made both cakes; they are surprisingly easy to make, and it was made start to finish during baby's morning nap!

Pink White Chocolate Chip Rose Cake


Ingredients

Cake Mix
  • 225g self raising flour
  • 165g caster sugar
  • 125ml milk
  • 125g soft butter
  • 1 tsp of vanilla extract
  • 2 large eggs
  • 3 drops of red food colouring
  • 100g of white chocolate chips
  • icing sugar to dust


Method
  1. Preheat oven to 160 degrees and grease the cake mould with some butter.
  2. In a food mixer, add all the dry cake mix ingredients and mix on low for a couple of seconds.
  3. Melt the butter in the microwave for a minute. Add the butter to a jug with the milk, eggs, vanilla, and food colouring.
  4. With the food mixer on slow, pour in the wet ingredients and mix until just combined, do not over mix.
  5. Scrape it into the cake mould and level it out evenly
  6. Bake in the oven for 45 mins.
  7. Check that the cake is fully baked with a skewer before removing from the oven (Insert skewer to centre of cake if it comes out clean it's done, if not bake for a further 5 mins and try again)
  8. Leave to cool on a wire rack in the mould until completely cooled.
  9. Invert the mould onto a plate to dislodge it from the mould and dust with icing sugar.


Triple Chocolate Love Heart Cake

Ingredients

Cake Mix
  • 220g self raising flour
  • 165g caster sugar
  • 125ml milk
  • 125g soft butter
  • 1 tsp of vanilla extract
  • 2 large eggs
  • 25g of cocoa powder
  • 100g of dark chocolate chips
  • 1 can of Dr Otker Chocolate flavoured cupcake buttercream
  • 50g of raspberries
  • Icing sugar to dust


Method
  1. Preheat oven to 160 degrees and grease the cake mould with some butter.
  2. In a food mixer, add all the dry cake mix ingredients and mix on low for a couple of seconds.
  3. Melt the butter in the microwave for a minute. Add the butter to a jug with the milk, eggs, vanilla.
  4. With the food mixer on slow, pour in the wet ingredients and mix until just combined, do not over mix.
  5. Scrape it into the cake mould and level it out evenly
  6. Bake in the oven for 45 mins.
  7. Check that the cake is fully baked with a skewer before removing from the oven (Insert skewer to centre of cake if it comes out clean it's done, if not bake for a further 5 mins and try again)
  8. Leave to cool on a wire rack in the mould until completely cooled.
  9. Invert the mould onto a plate to dislodge it from the mould.
  10. Frost the cake with the ready made chocolate buttercream, decorating however you like. I scattered the raspberries in a heart shape in the centre for the extra 'cheezy' factor.
  11. Dust with icing sugar.


Saturday, February 1, 2014

Rachel's Chocolate Mousse Cake


I ADORE this recipe from Rachel Allens's Easy Meals book. She says in the book that you have to make it to believe it and I 100% agree. For a cake that simple to make, it really has the WOW factor for a dinner party. There are hardly any ingredients and its made start to finish in 30 minutes. What more could you ask for. 


This cake has the added appeal of being gluten free. I'm often asked to cater for girls who need a gluten free diet at my Fancy Pants Tea Parties, and I'm totally confident that this cake delivers that little something special. You don't have to follow a gluten free diet to enjoy this cake, it vanishes in what seems like seconds. 


This is not my recipe, but its so delicious and impressive and most importantly, easy; I just had to share it with you!!! I highly recommend Rachel Allen's Easy Meals book, fantastic recipes for everyday life, with some great recipes that have a little pizzazz! The only thing I did differently is topped the cocoa powder with a little icing sugar and pimped it up with some pomegranate seeds, to make it really girlie.


Ingredients
  • 300 g dark chocolate, broken into pieces, or dark chocolate drops
  • 150 g butter
  • 5 eggs
  • 50 g caster sugar
  • cocoa powder, for dusting
  • 20cm (8in) diameter spring-form/loose bottomed cake tin
Method
  1. Preheat the oven to 180°C (350°F/Gas 4). Line the base of the cake tin with a disc of baking parchment and grease the sides with butter.
  2. Place the chocolate and butter in a heatproof bowl set over a saucepan of simmering water and allow to melt, then remove from the heat and set aside.
  3. Place the eggs and sugar in a separate bowl and, using a hand-held electric beater or electric mixer, whisk for 7–10 minutes or until the mixture forms a light, pale mousse.
  4. Fold the chocolate mixture into the eggs until fully combined, then pour into the prepared tin and bake for 20–22 minutes or until the cake is almost set. Allow to cool down completely in the tin before removing, then dust with cocoa powder and cut into slices to serve.

Tuesday, November 12, 2013

Cheats Gold Star Chocolate Chip Cake


I baked this cake to mark my daughters six month 'birthday' last month. I was up against the clock with work in the B&B, and had told my family to drop by for cake, so I adapted my Quick Blueberry & Apple Cake (http://serenasmediumrare.blogspot.ie/2013/04/quick-apple-blueberry-almond-cake.html) recipe to made a super fast and easy chocolate 'birthday' cake. My little cheat in the process came in the form of pre-made butter cream frosting courtesy of Better Crocker - a lifesaver in last minute baking dilemmas. The frosting tasted great also which was a surprise. I would use it again in a bind hands down! 


This recipe is for your basic chocolate sponge, and in fact I use the same ingredients and quantities for my breakfast muffins for the B&B. How you wish to decorate the cake is totally up to you. I took the lazy approach with Dr Oetker edible gold glitter spray, Betty Crocker buttercream frosting, and Milky Way Chocolate stars. If anything else, its great practice for the actual '1st Birthday' cake. If you want to be super indulgent, double the recipe, bake 2 sponges and sandwich them together with chocolate buttercream frosting..........now that's a cake I'll be baking in the future...


Anyway, here's how I made the chocolate cake. It's seriously simple and yet impressive to look at, people would think you had been slaving for hours.

Ingredients

  • 200g self raising flour
  • 25g of cocoa powder
  • 100g of chocolate chips
  • 165g of caster sugar
  • 125ml of milk
  • 125g butter, melted 
  • 2 large eggs

Decoration

  • 1 12oz carton of Better Crocker buttercream frosting
  • 10 mini bags of milky way gold stars
  • 1 can of gold food glitter spray


Method

  1. Preheat oven to 160 degrees and line a spring form tin
  2. In a food mixer, add all the  dry cake ingredients first and stir to combine
  3. Add  the eggs, butter, milk and vanilla extract to a jug and whisk to combine.
  4. Add the wet ingredients to the dry and mix until just combined (do not over whisk)
  5. Scrape it into the cake tin and level it out evenly.
  6. Bake in the centre of the oven for 45 minutes.
  7. Check that the cake is fully baked with a skewer before removing from the oven (Insert skewer to centre of cake if it comes out clean it's done, if not bake for a further 5 mins and try again)
  8. Leave to cool on a wire rack before decorating.
  9. Using a spatula, spread the buttercream out evenly over the cake.
  10. Dot the chocolate stars in a uniform fashion all over the cake.
  11. Spray the whole cake lightly with the gold spray. (optional of course, but in for a shilling, in for a pound)

Monday, August 19, 2013

Egg & Dairy Free Chocolate Cake


Because life's too short to be unable to enjoy cake!!!

When I had a guest at the B&B recently who told me that she had an allergy to eggs and dairy, I really wanted make something for her that she could enjoy. I had blueberry muffins and brown bread for other guests and I wanted my guest with the allergies to have the same sort of choice for breakfast as everyone else and not just have to be content with muesli soaked with orange juice.
Challenge!!! I told her for the next morning I would have a suitable breakfast choice for her. She told me that she likes coconut milk and almond milk and often substitute recipes with milk for these products.
I decided that banana pancakes would be possible using almond milk and a chocolate cake could possibly work well with coconut milk!!! Both were very sucessful. Here's the recipe I used for the chocolate cake. I must say every guest was enjoying them so much, I had to hide some back for the guest that they were intended for.

Ingredients
  • 170g of self raising flour
  • 170g caster sugar
  • 2 tbsp of cocoa powder
  • 230ml of coconut milk
  • 6 tbsp of sunflower oil
  • icing sugar to decorate.

Method
  1. Preheat the oven to 180 degrees.
  2. Grease an 8 inch cake tin with 1 tbsp of sunflower oil.
  3. Sift the flour, sugar and cocoa powder together.
  4. Mix the coconut milk and the sunflower oil together.
  5. Fold the wet ingredients into the dry ingredients.
  6. Spoon into the cake tin and bake in the oven for 20 to 25 minutes.
  7. Remove from the oven and allow to cool in the tin on a wire rack.
  8. Turn out the cake onto the rack then turnover onto a serving plate.
  9. Cut into equal slices and dust with icing sugar.

Tuesday, April 9, 2013

Quick Apple, Blueberry & Almond Cake


Following watching an episode of Donna Hay's Fast Fresh & Simple cookery programme, I couldn't wait to try out her recipe for what seems to me to be the easiest cake you'll ever make. The only tweak to the recipe is that I've added some flaked almonds for some crunch to the topping, the rest is Donna Hay's.


I'm calling this my Waiting for Baby cake!!! Tomorrow is my baby due date so I wanted to keep myself busy in the kitchen without over exerting myself at this point; so I thought this recipe would be perfect, quick and easy and not too much waddling involved, plus there's the tasty treat at the end! You gotta keep the energy levels up you know!!


Ingredients

Cake Mix
  • 225g self raising flour
  • 165g caster sugar
  • 125ml milk
  • 125g soft butter
  • 1 tsp of vanilla extract
  • 2 large eggs

Topping
  • 1 apple, sliced thinly
  • 100g of blueberries
  • 25g of flaked almonds
  • Demerara sugar for sprinkling

Method
  1. Preheat oven to 160 degrees and line a spring form tin
  2. In a food mixer, add all the cake mix ingredients and mix on low until combined
  3. Scrape it into the cake tin and level it out evenly
  4. Top with the apple slices evenly and scatter over the almonds and blueberries
  5. Finally sprinkle with the demerara sugar and bake in the oven for 45 mins.
  6. Check that the cake is fully baked with a skewer before removing from the oven (Insert skewer to centre of cake if it comes out clean it's done, if not bake for a further 5 mins and try again)
  7. Leave to cool on a wire rack before gobbling the whole thing up.

This is either perfect for afternoon tea or served warm with ice-cream as a great dessert for a dinner party.

Delicious - Donna Hay....I salute you!


Related Posts Plugin for WordPress, Blogger...